
Invoicing from your tracked time
Turn billable hours into a draft invoice in a few clicks - no copy-pasting line items.
If you log time in Keepr, you can turn billable hours straight into a draft invoice. Open Invoice from Time, pick a client, choose which entries to include and how they should appear as lines, then click Generate Draft Invoice. Keepr builds the lines, marks the entries as billed, and drops you on the draft to tweak and send.
Before you start
The wizard only shows entries that have a client set, have the Billable toggle on, and have been stopped (running timers don't appear). If something's missing later, open the entry under Time Logs and check those three.
Two ways in
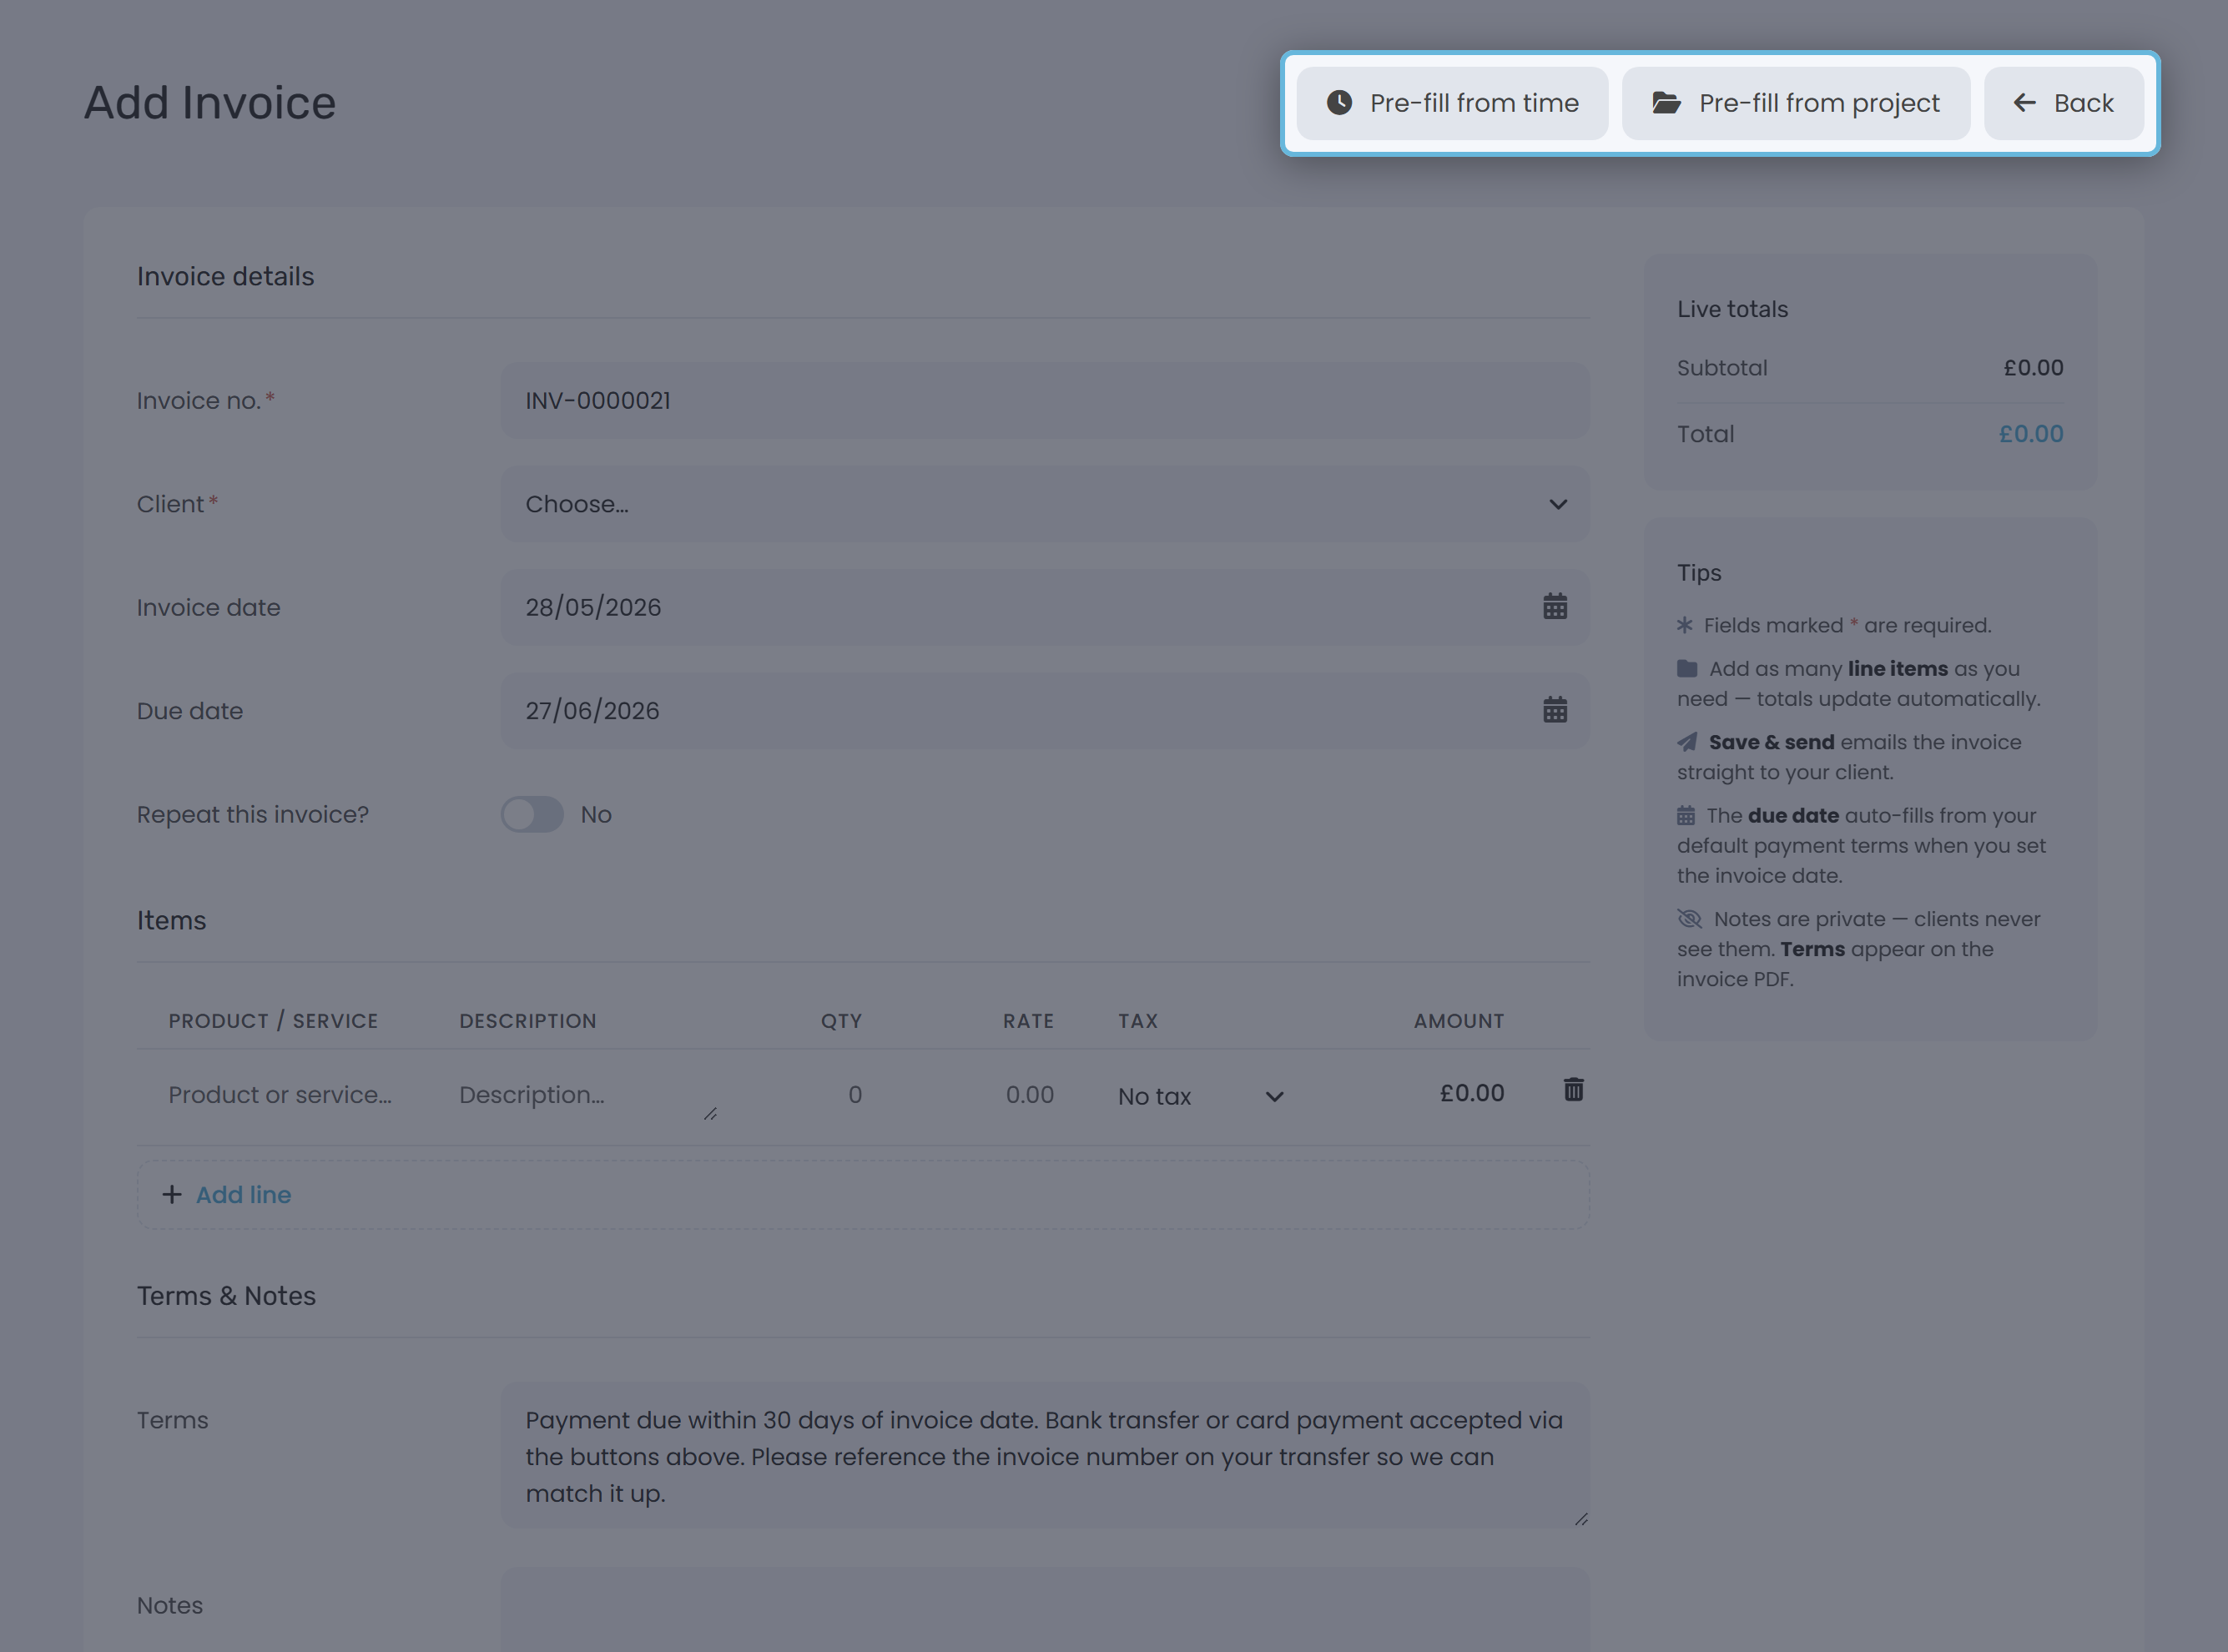
Either open Invoices in the sidebar and click From time, or - if you already started a blank invoice - click Pre-fill from time in the top-right action row of the Add Invoice form. Both land you in the same wizard.
Step 1: Choose a client
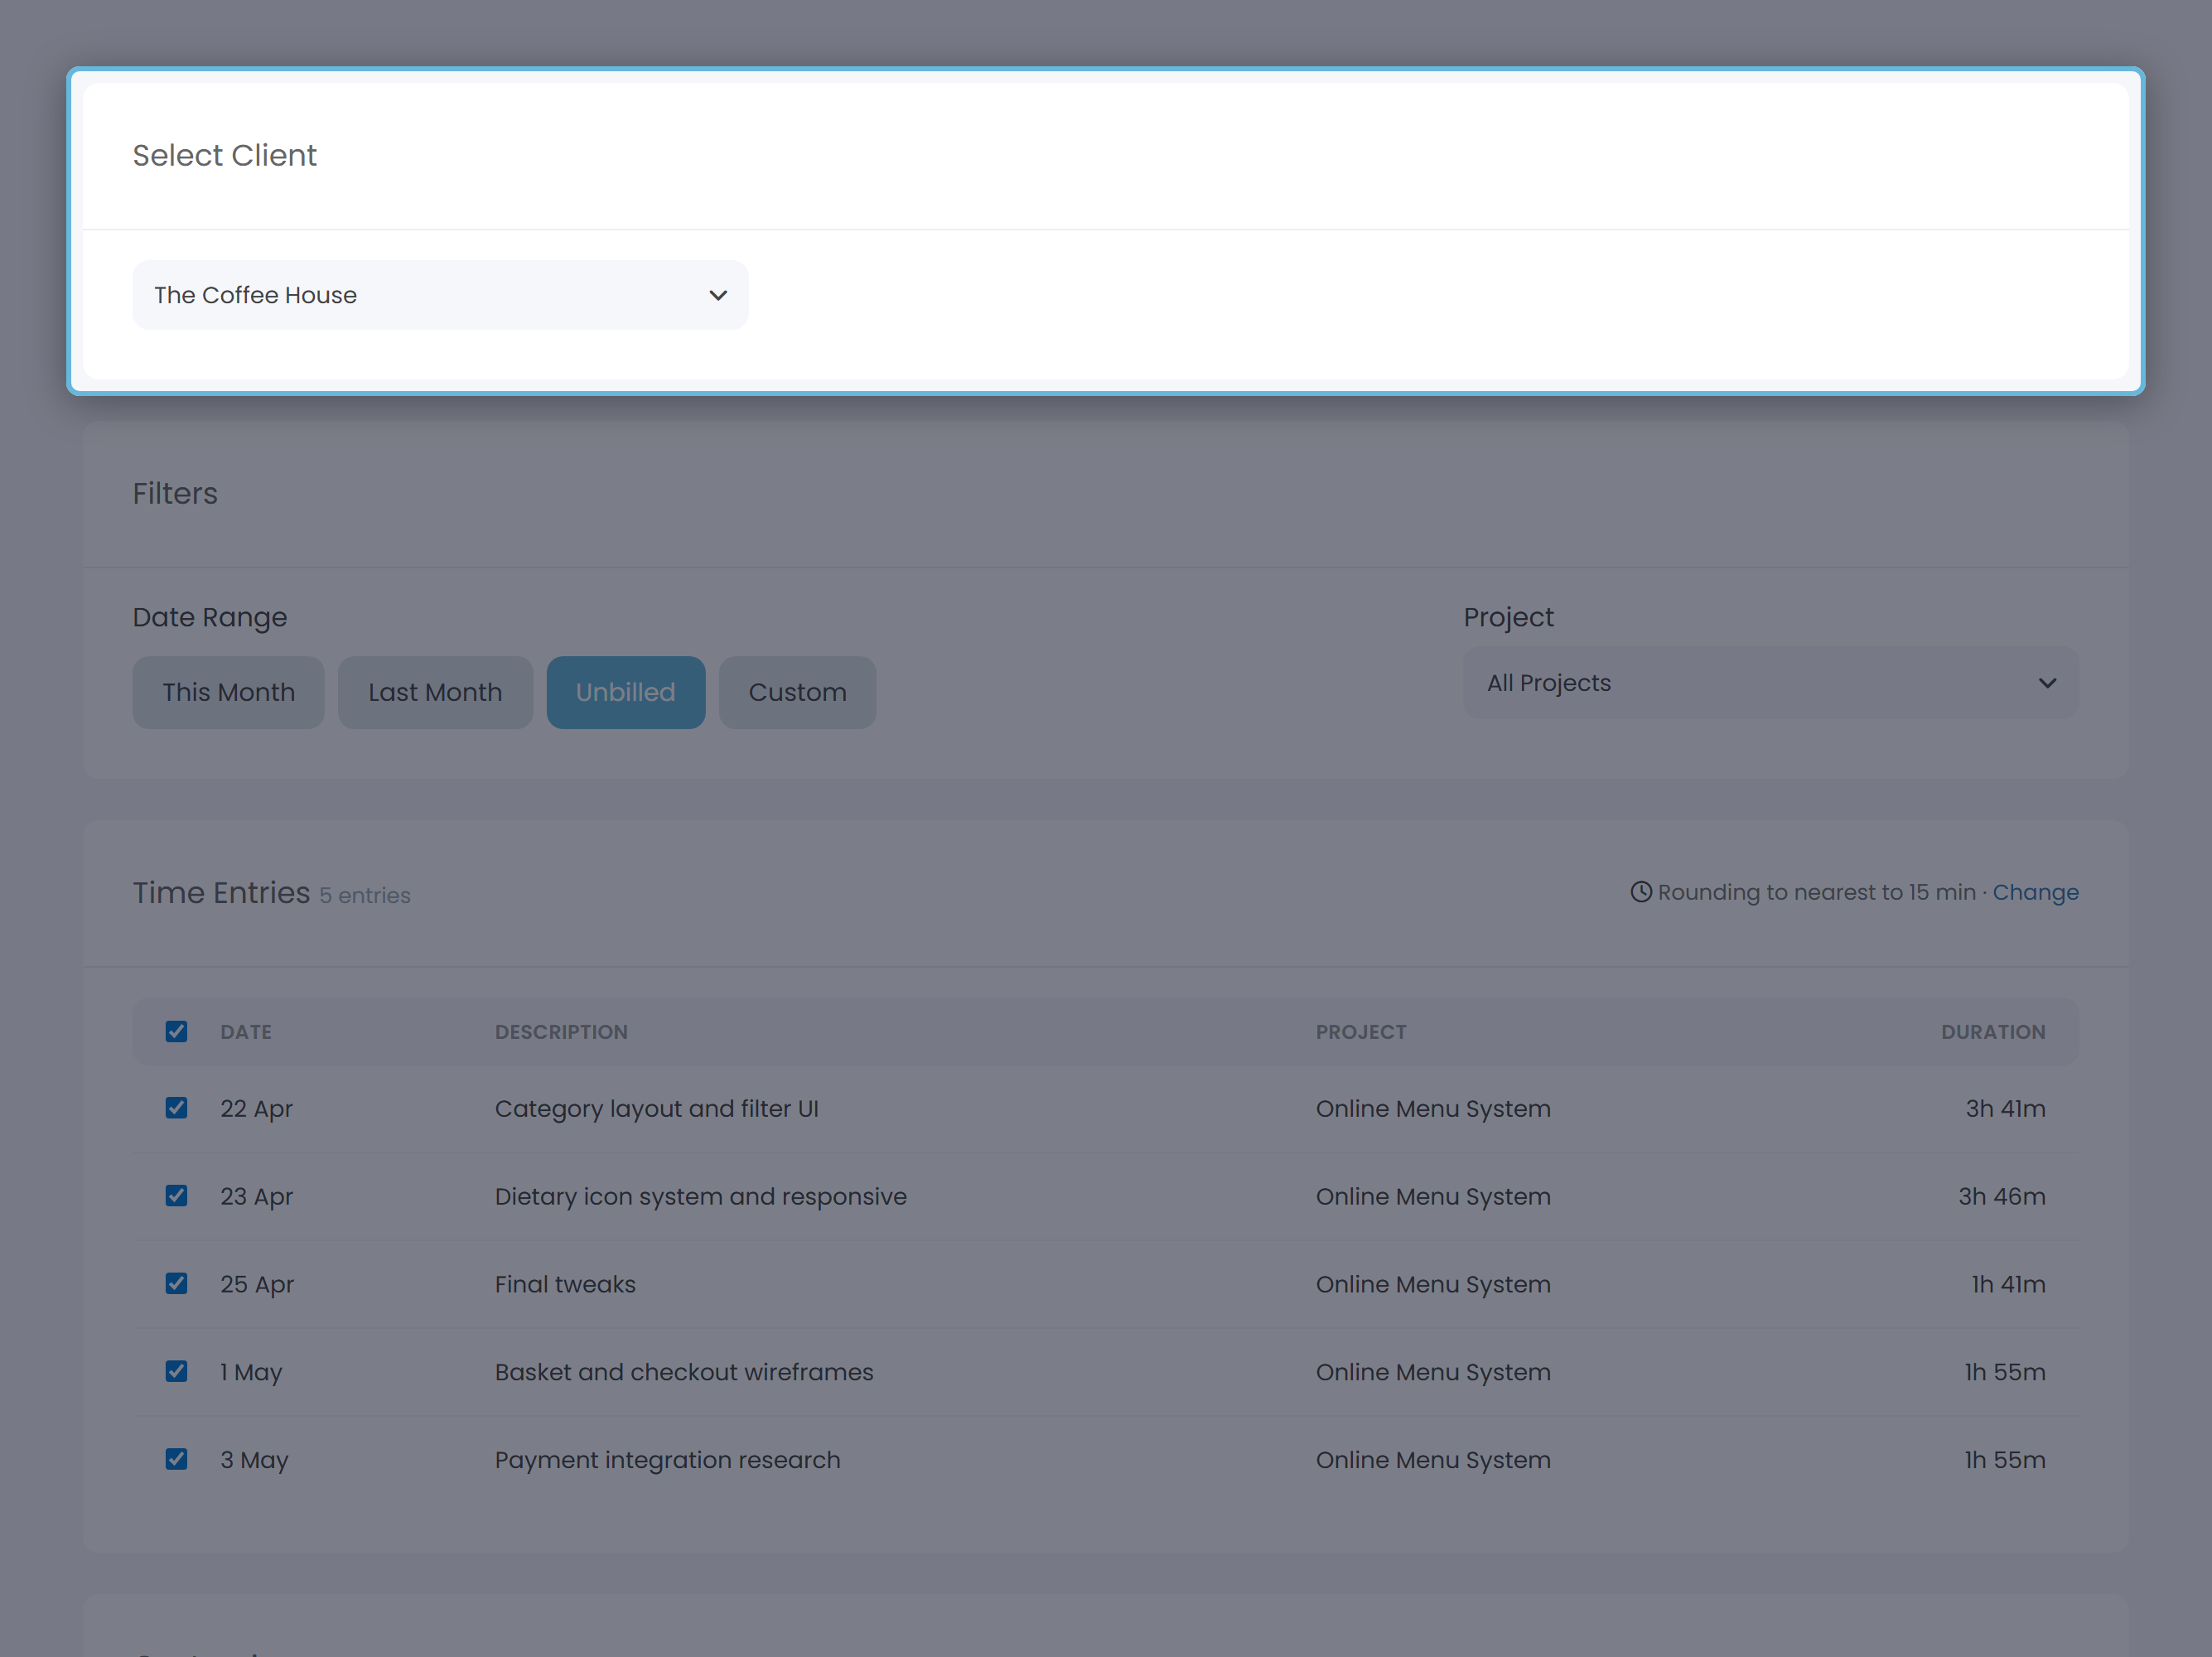
At the top of the page is a dropdown labelled Choose a client.... Type to filter, then pick the client. The rest of the wizard reveals itself once a client is selected.
Step 2: Filter the entries
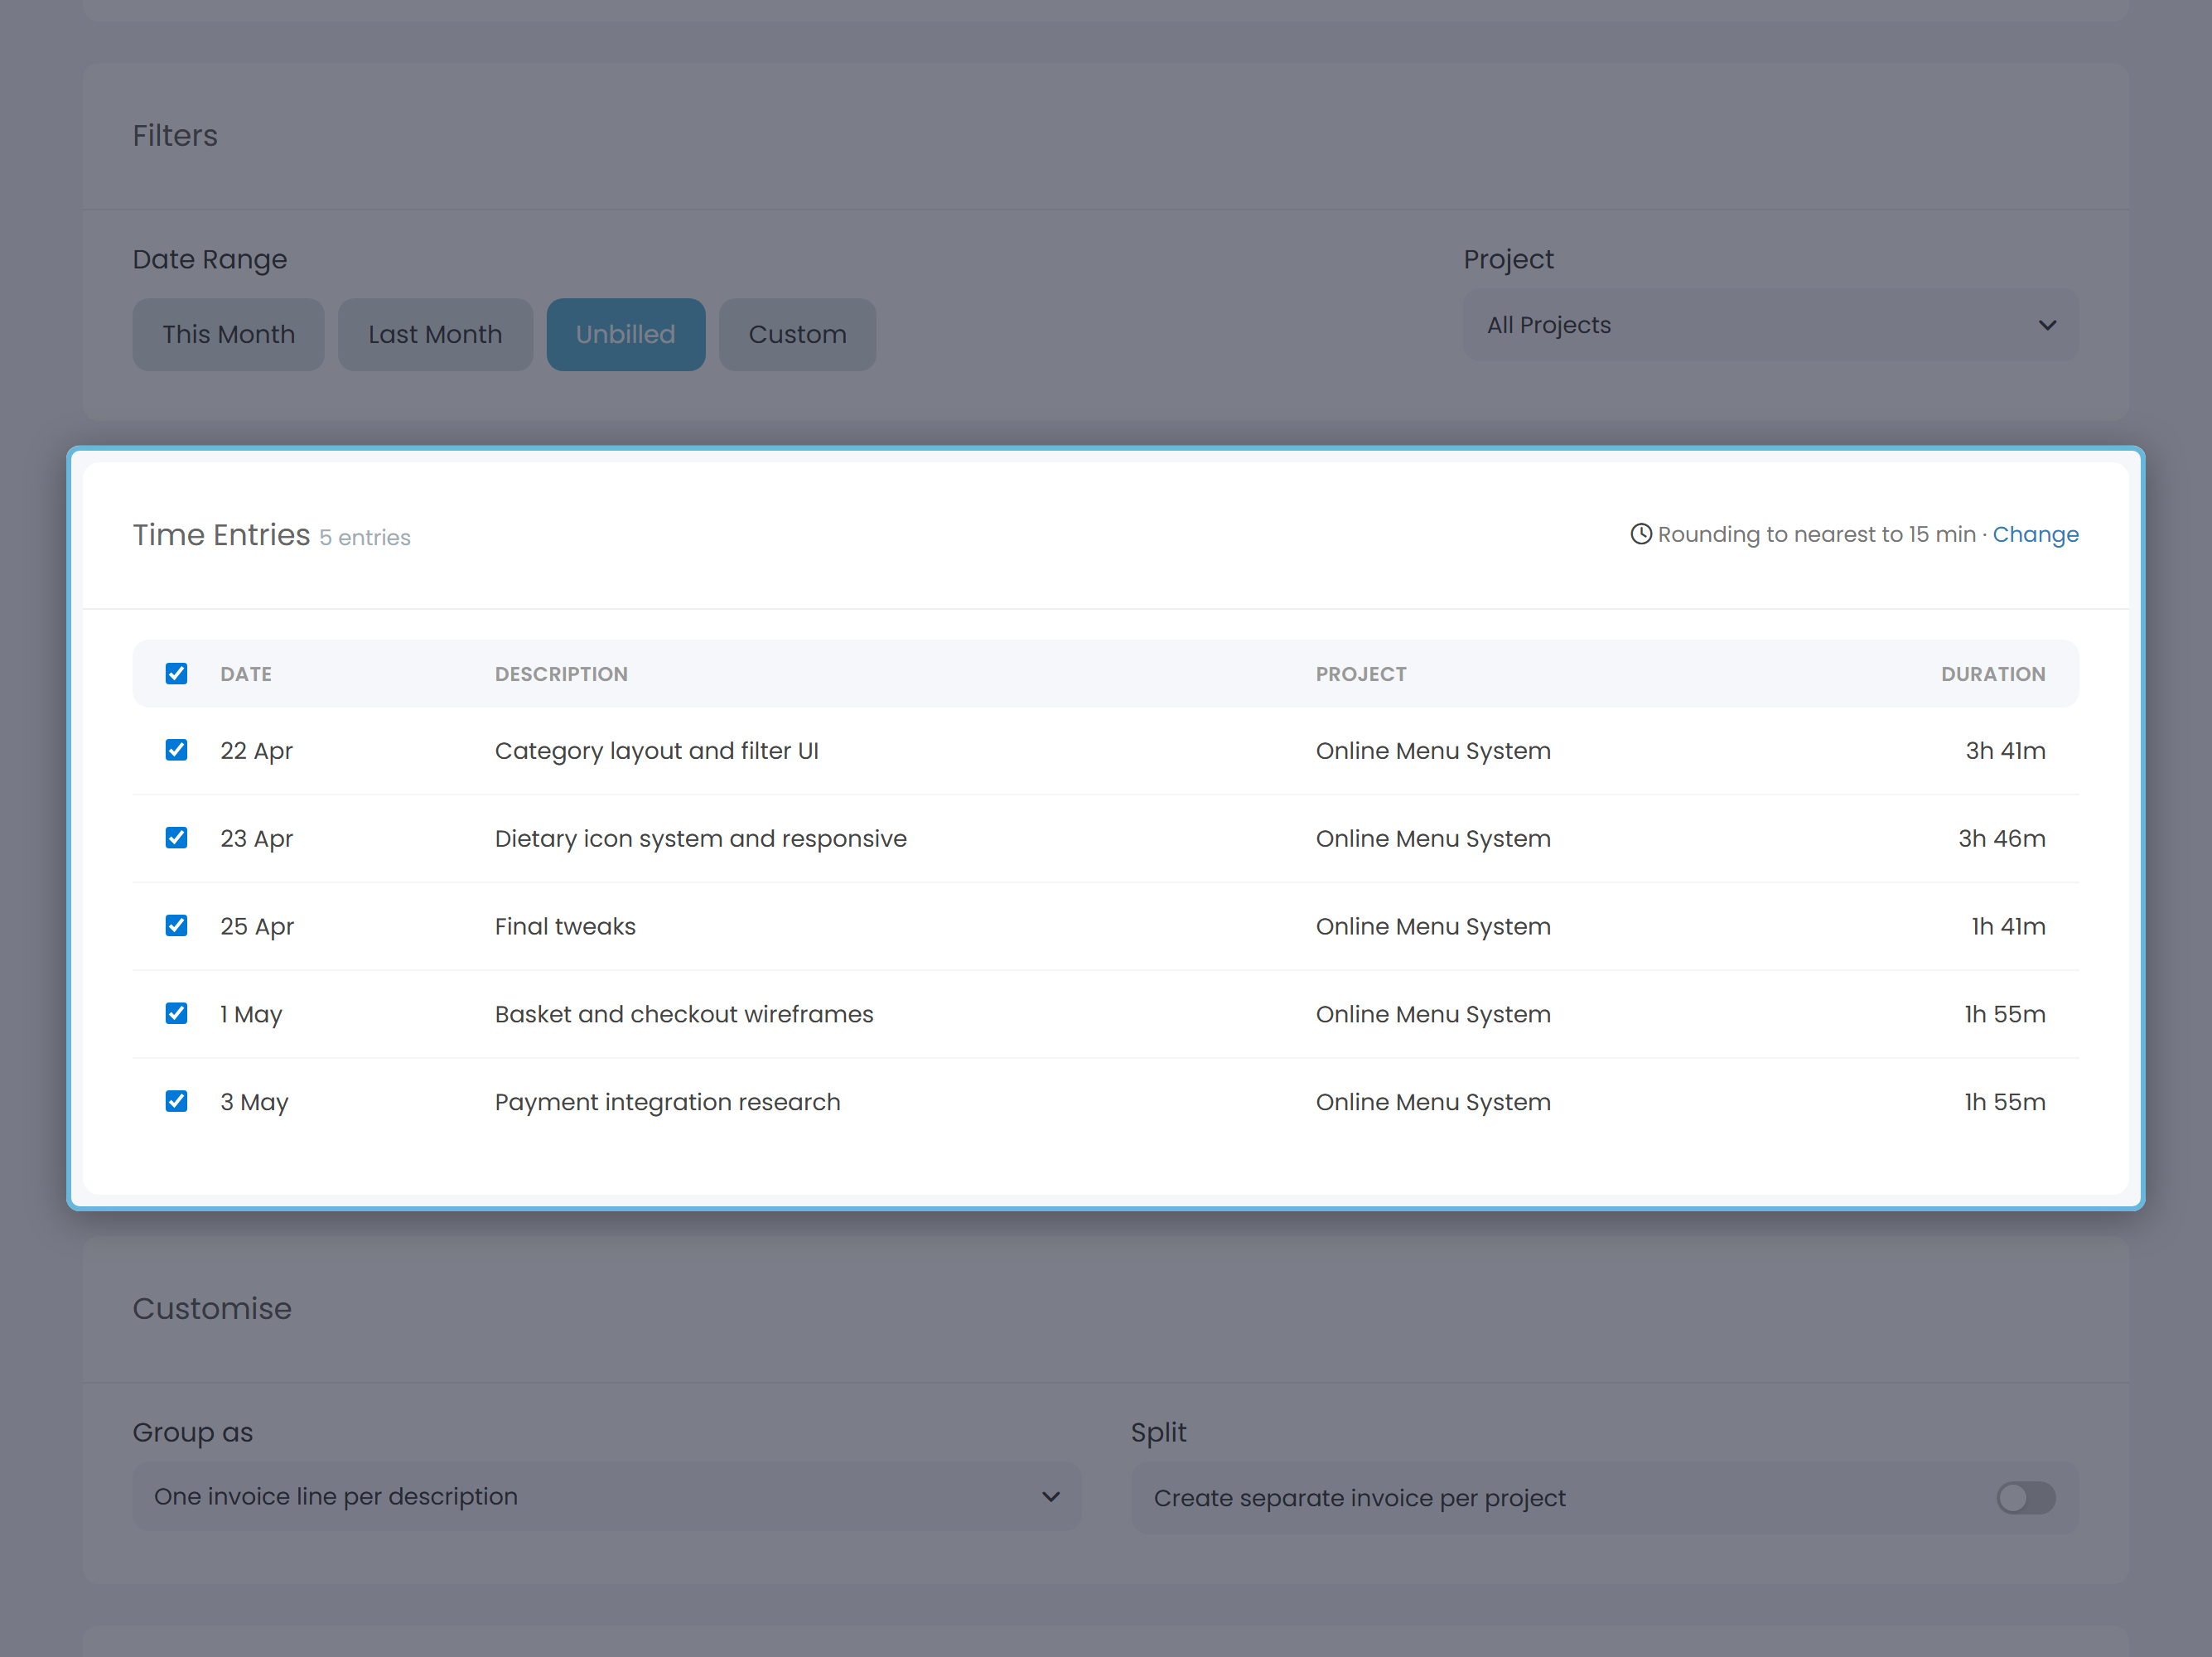
Use the Date Range buttons to control which entries appear:
| Preset | What it shows |
|---|---|
| This Month | Entries from the 1st of this month up to today (the default). |
| Last Month | Entries from the whole of the previous calendar month. |
| Unbilled | Every billable entry for this client that hasn't been put on an invoice yet - no date limit. |
| Custom | Reveals two date pickers; pick a From and To date and click Apply. |
The Project dropdown on the right narrows the list to a single project. Leave it on All Projects to include everything.
Step 3: Pick which entries to include
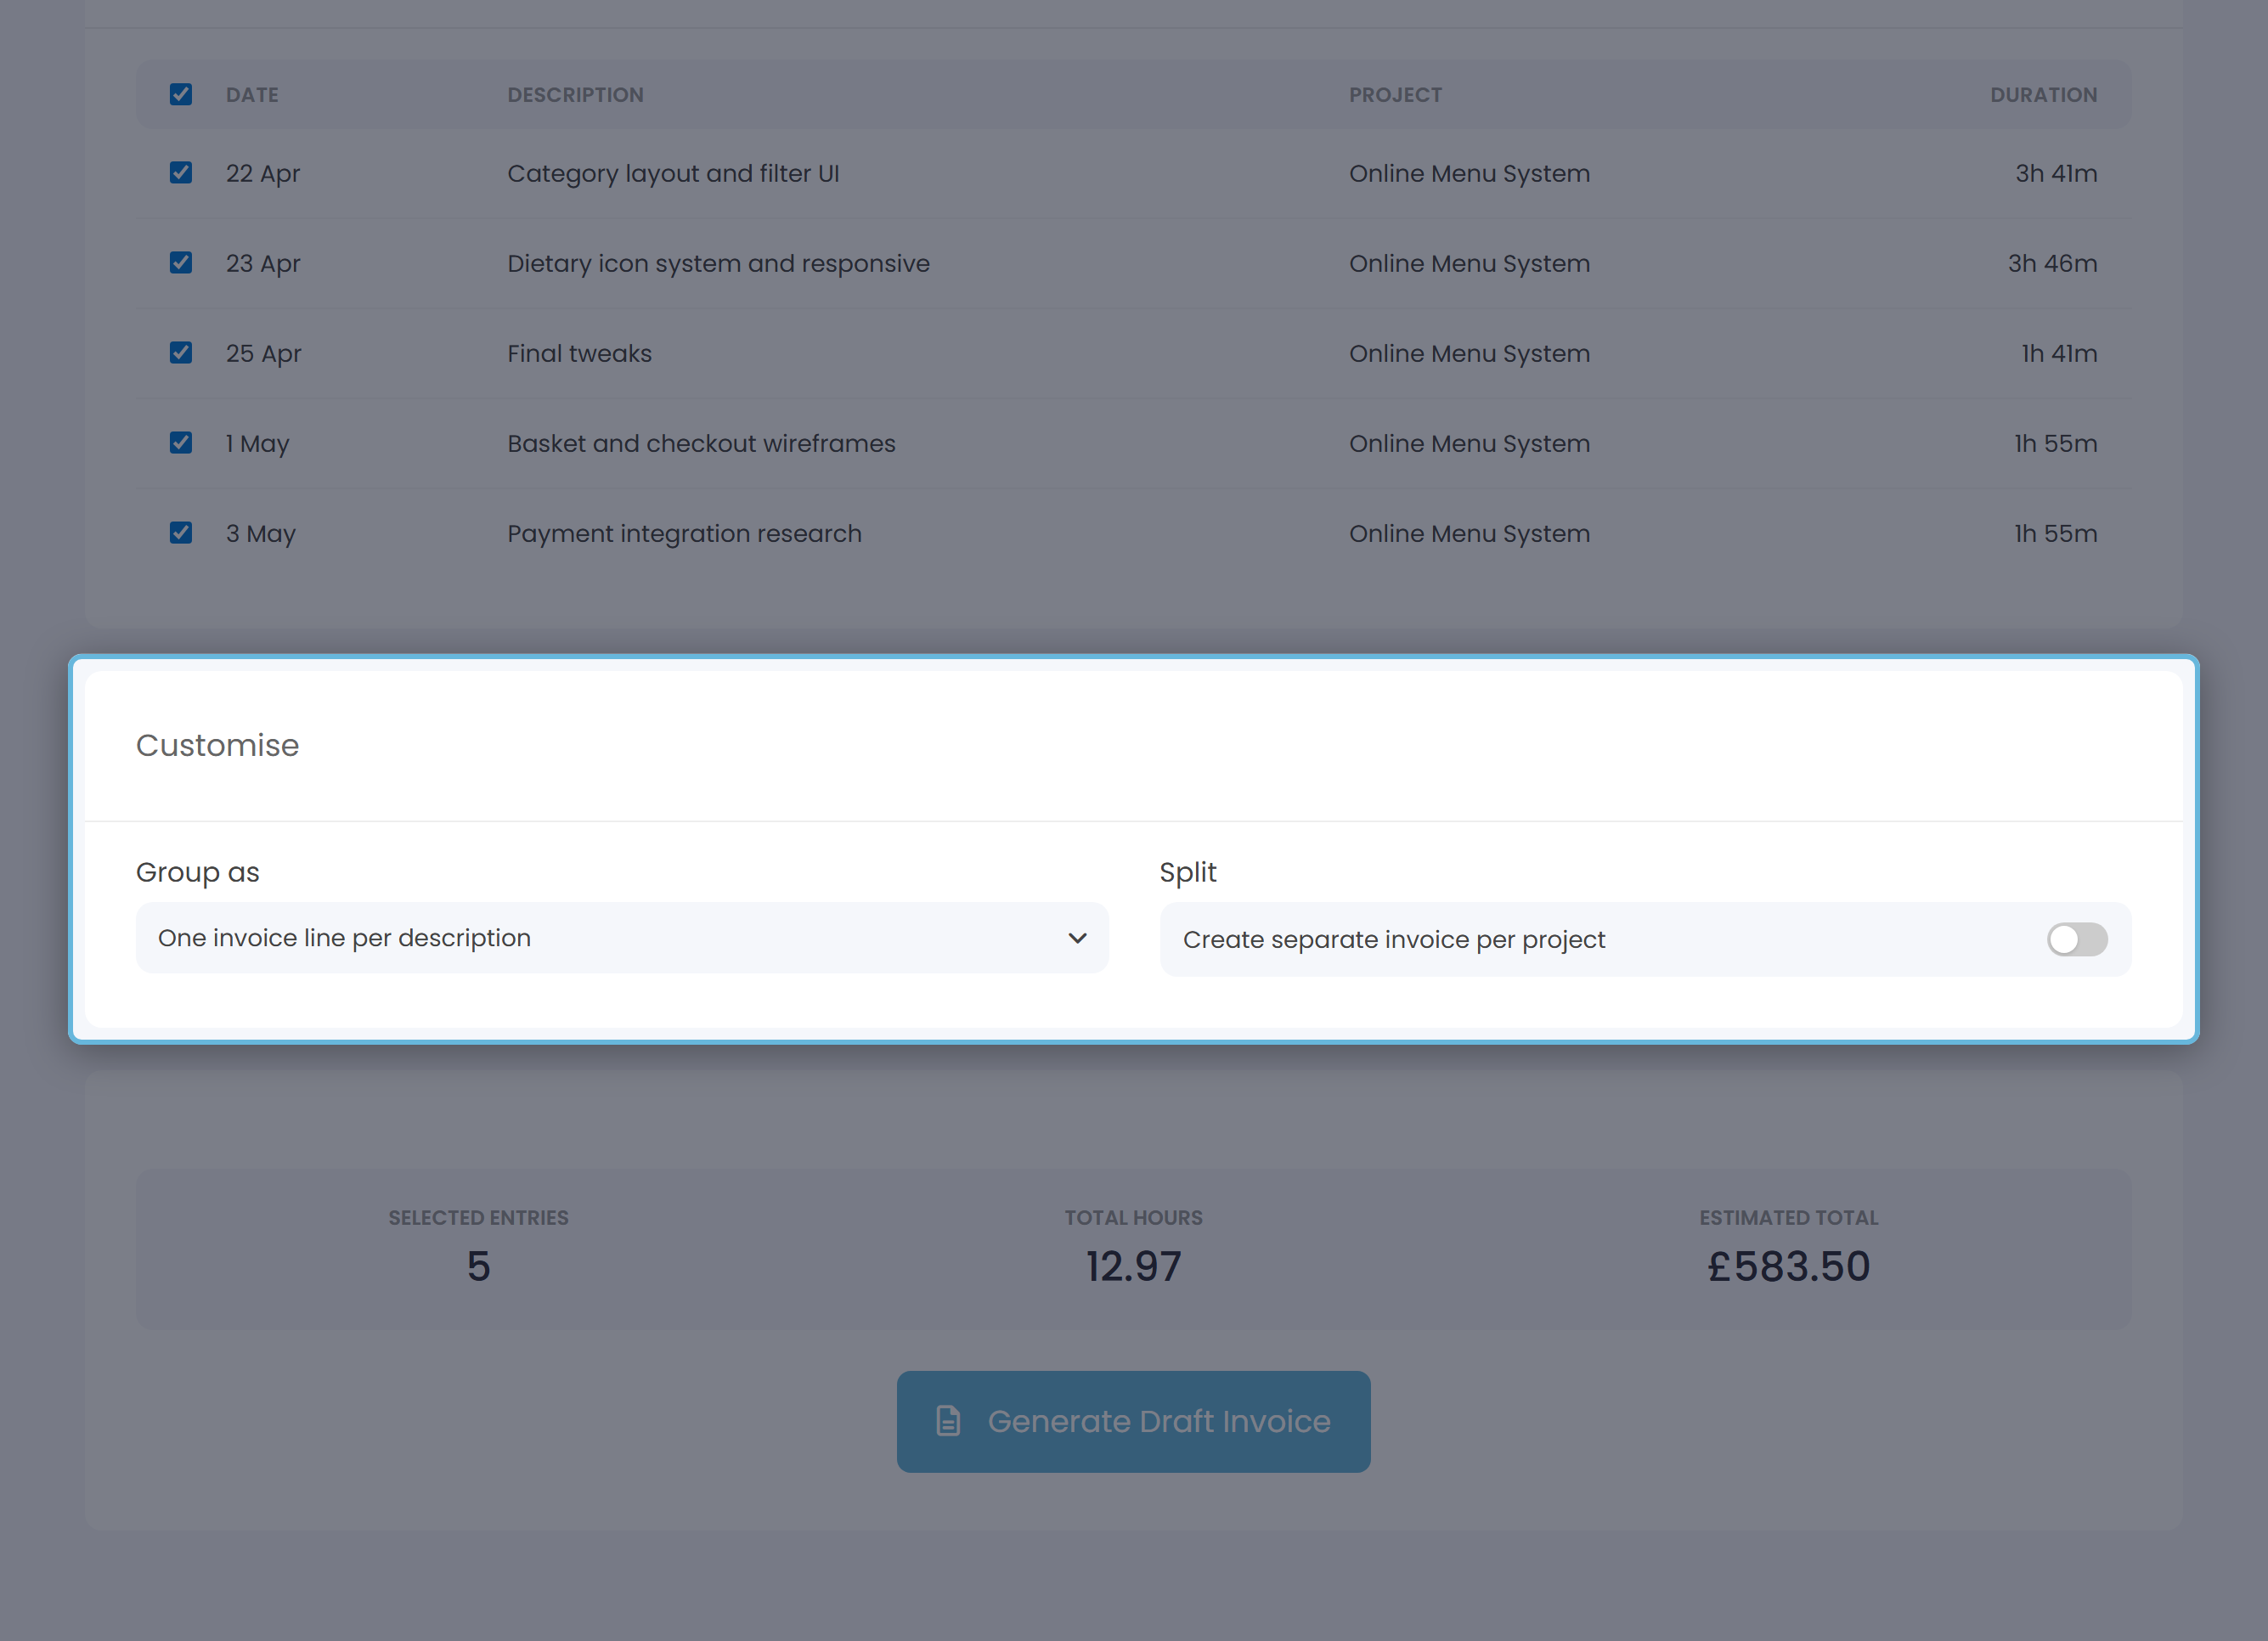
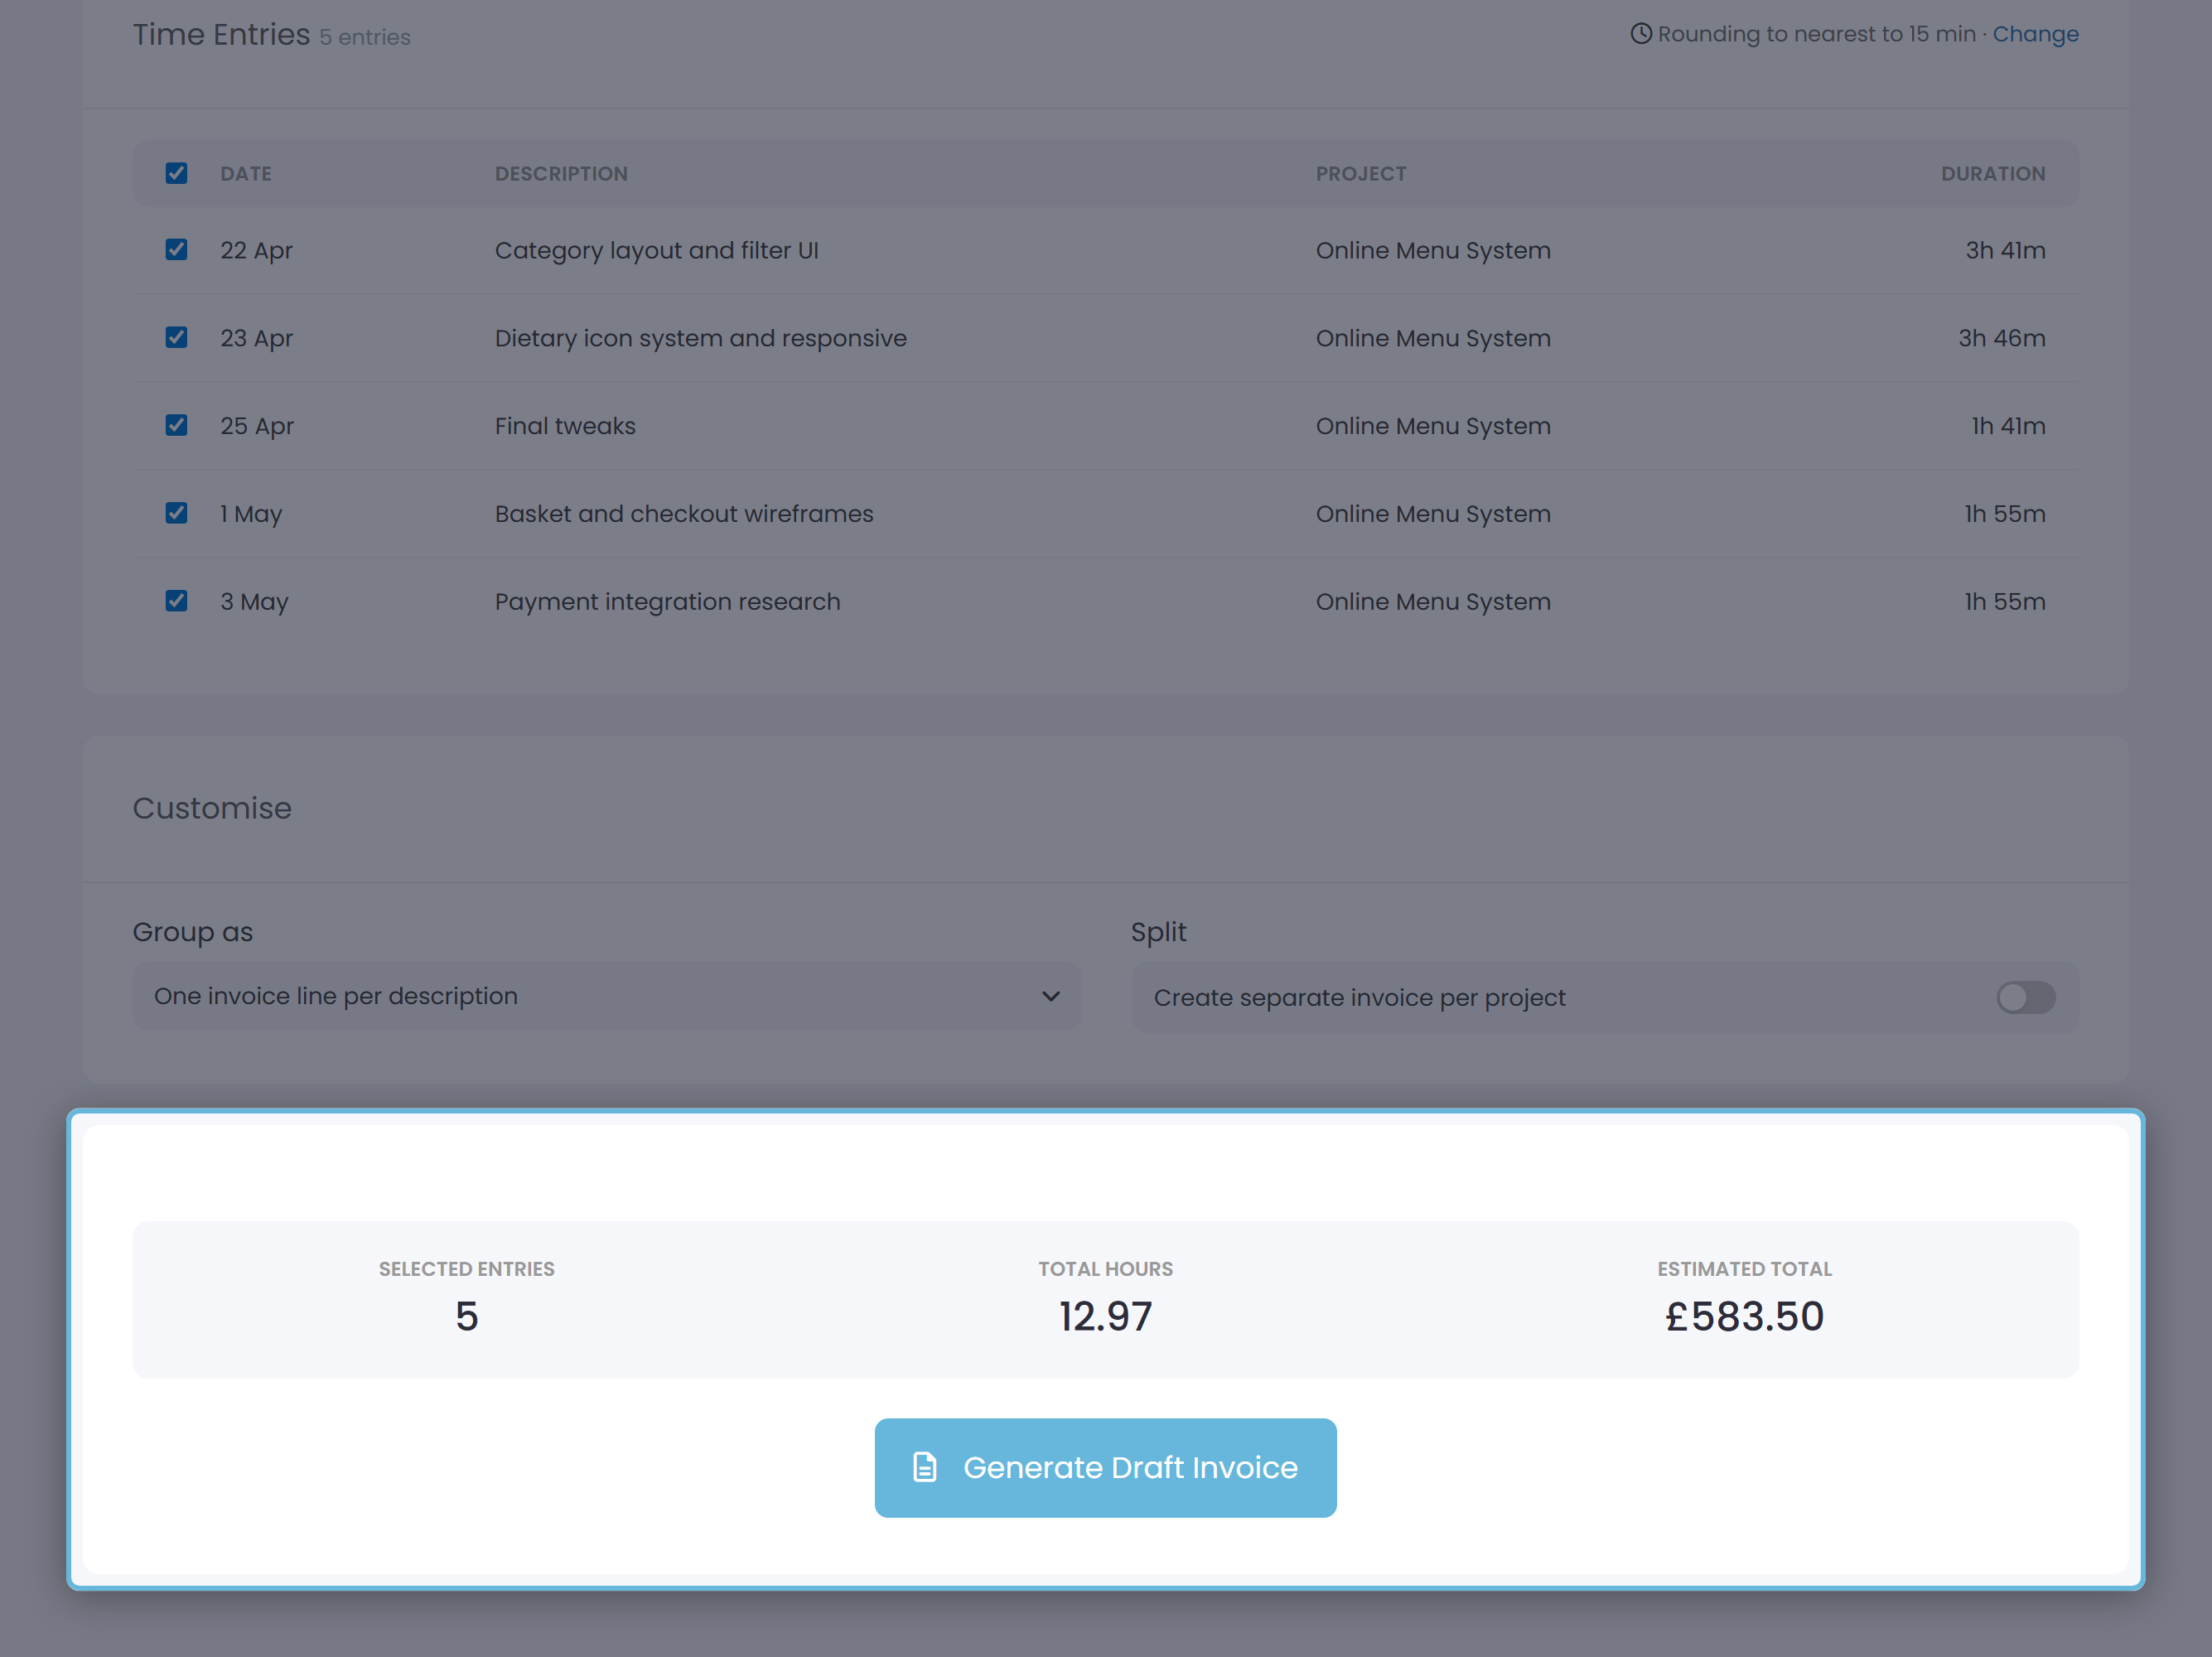
The table lists every matching entry with its date, description, project, and duration. The header checkbox toggles them all; row checkboxes let you exclude specific entries. Your current time-rounding setting (e.g. Rounding to nearest 15 min) sits above the table with a link to change it in Settings → Work.
Step 4: Decide how the entries become invoice lines
The Customise section has a Group as dropdown with five options. This is the most important choice in the wizard - it controls how your hours read on the final invoice.
| Group as | What the invoice looks like |
|---|---|
| One invoice line per description | Entries with the same description text merge onto one line. Good when you reuse a few standard descriptions. |
| One invoice line per task | One line per linked task - useful when you tag time to specific tasks in a project. |
| One invoice line per project | One line per project. The description lists each distinct activity worked on (up to 15, with "…and N more" if there are more). |
| One invoice line per session | Every single time entry becomes its own line, including the date and start-end times. Maximum transparency, longest invoice. |
| Single invoice line | Everything collapses into one line - date range, projects, and entry count in the description. |
Beside the dropdown is a toggle: Create separate invoice per project. Switch it on to generate one draft per project instead of one combined invoice.
Step 5: Check the numbers and generate
At the bottom of the page a summary strip shows Selected Entries, Total Hours, and Estimated Total - calculated using each entry's own snapshot rate, not today's rate. Happy with the numbers? Click Generate Draft Invoice.
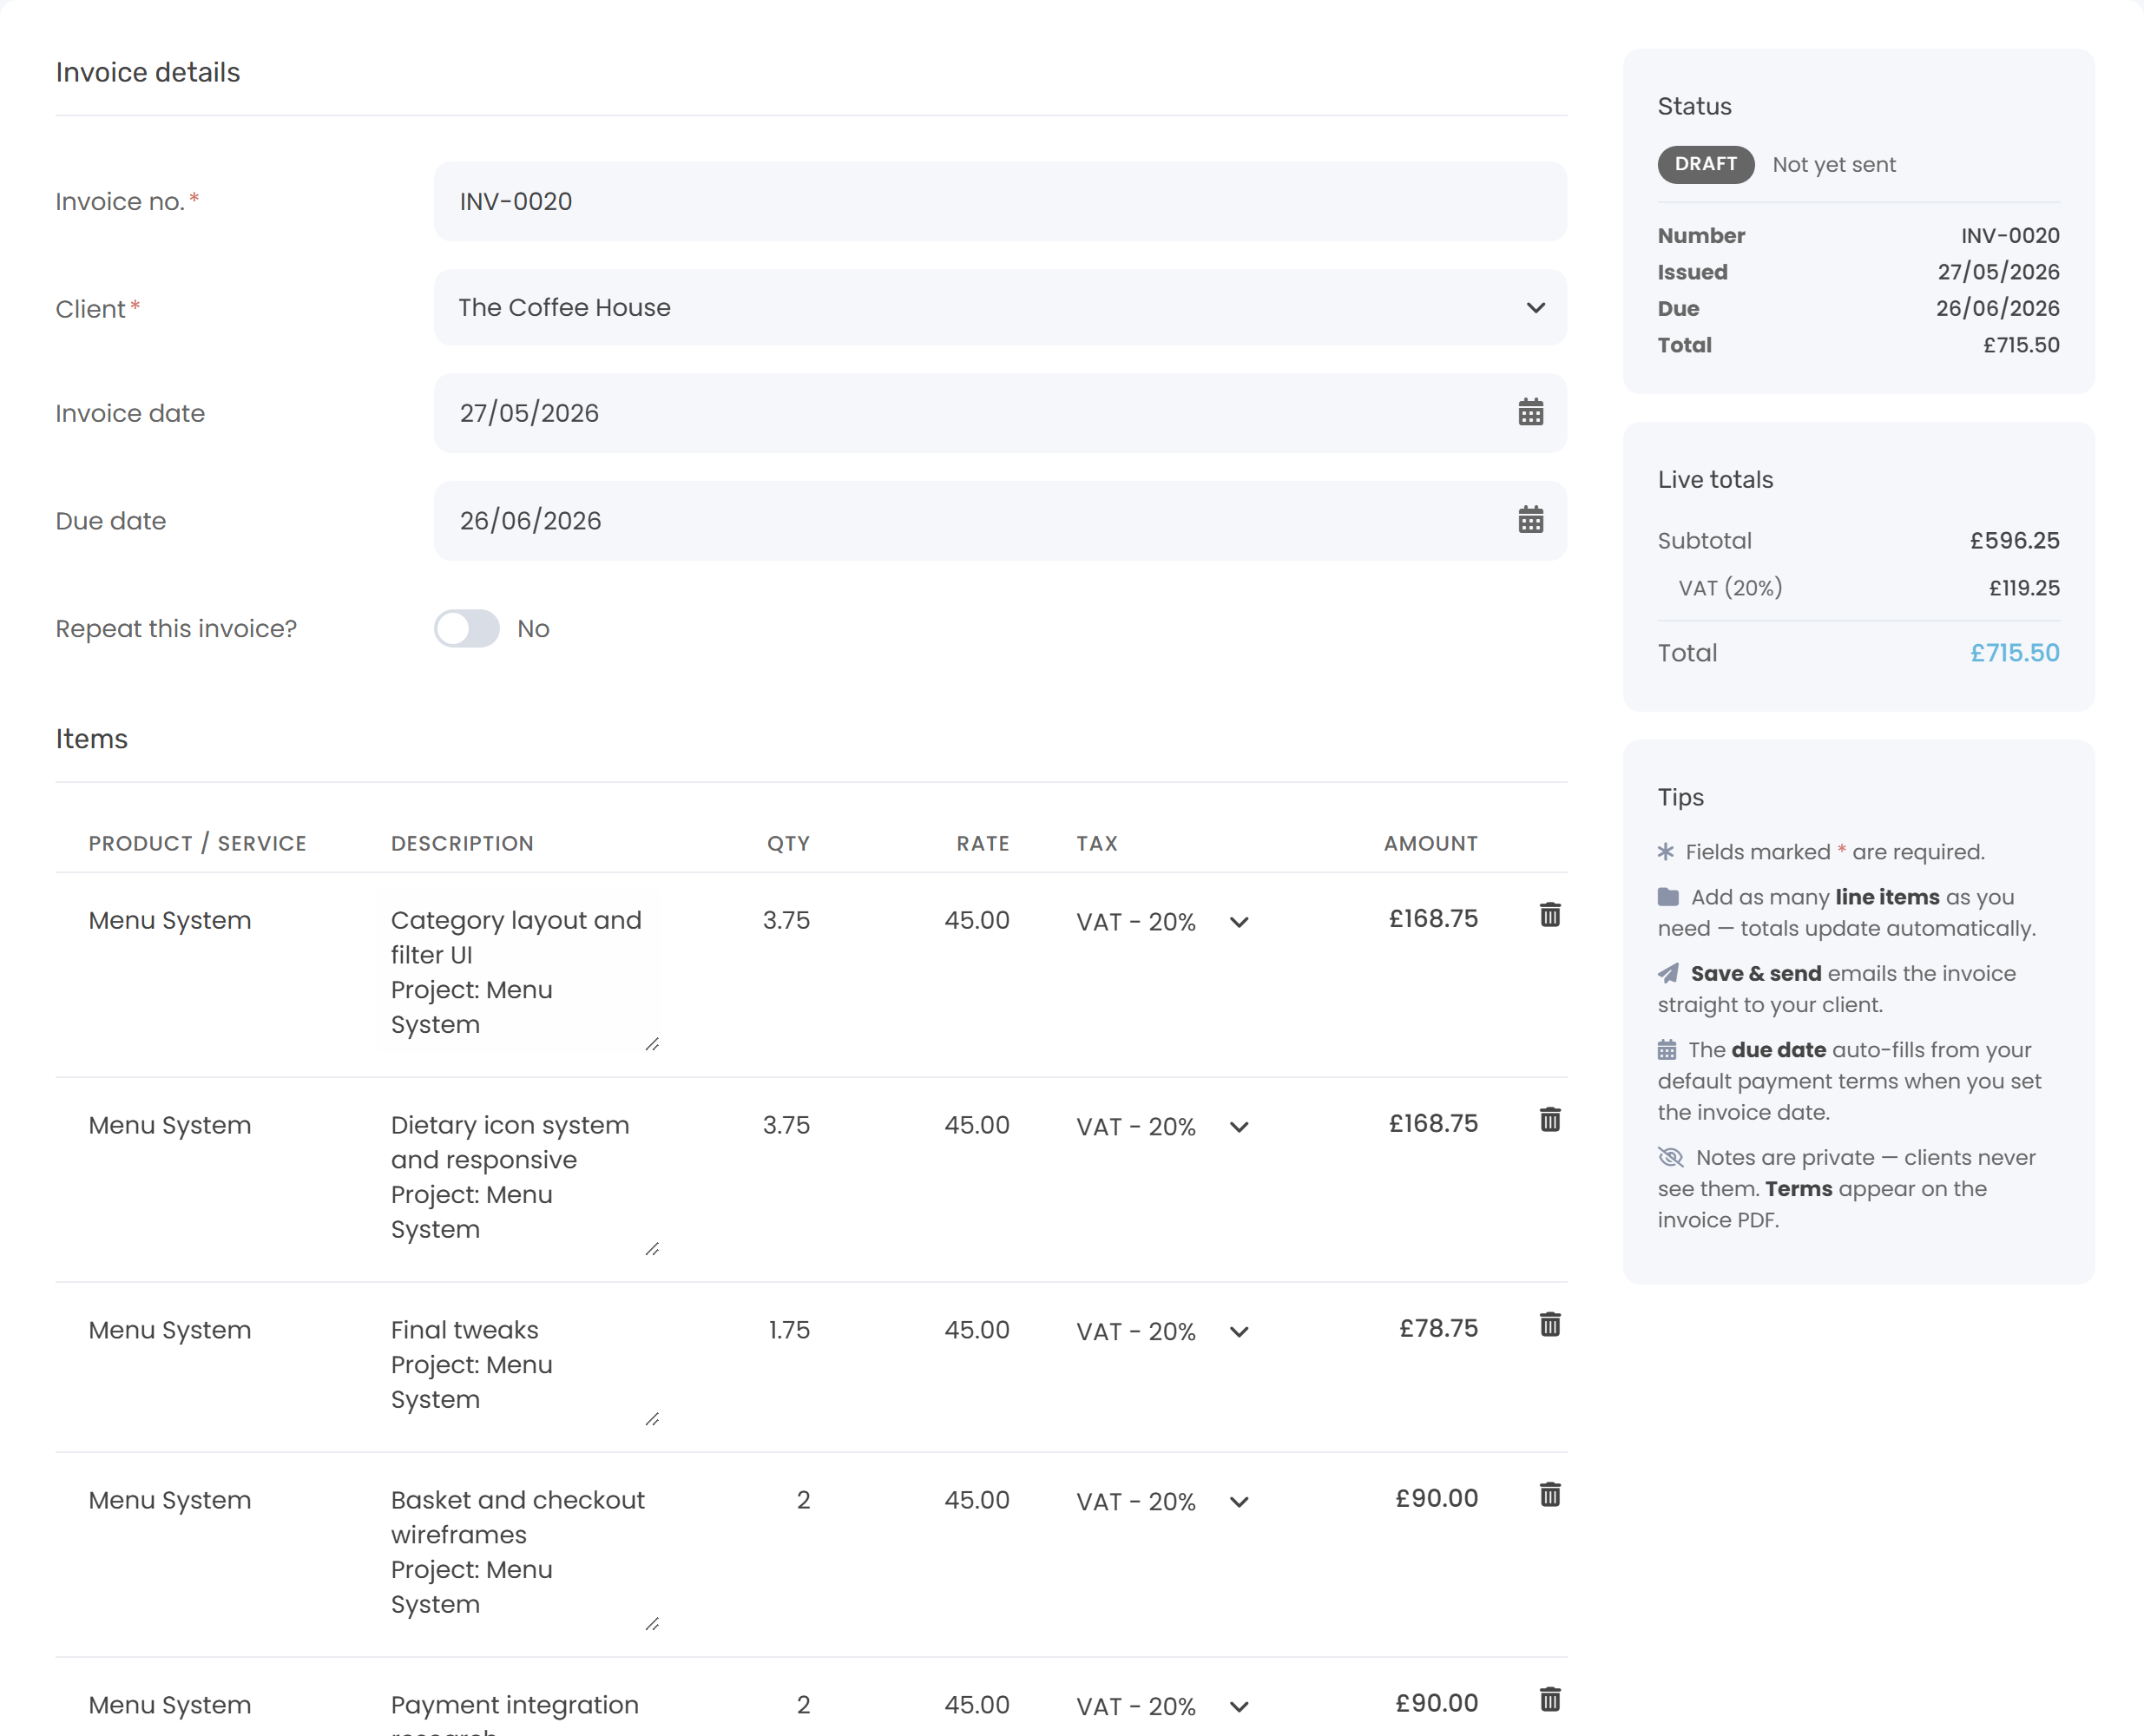
In one step Keepr creates a Draft invoice with the usual numbering (e.g. INV-0000001) and a due date based on your default payment terms, builds the line items, marks every selected time entry as billed so it won't reappear here, and opens the new draft in edit mode.
Step 6: Edit and send the draft
The draft opens on the standard Add Invoice form with all the line items pre-filled. From here it behaves like any other invoice - tweak any line by hand, add or remove lines, set tax, check the due date, then click Save draft or Save & send. See the first-invoice guide for the full sending walkthrough.
What about Pro?
The from-time wizard is available on both Free and Pro plans - there's no Pro wall between tracking time and turning it into an invoice. Pro perks kick in once the invoice is sent: branded email template, automatic reminders for unpaid invoices, and a reduced Keepr fee on Stripe card payments.