
How to track time on a project in Keepr
Use Keepr's built-in timer or log past work by hand, then turn those hours into an invoice.
To track time on a project in Keepr, open Time in the sidebar, pick a client and project in the timer row, type what you're working on, and click Start. Click Stop when you're done. Keepr saves the entry with a snapshot of the hourly rate so you can bill for it later. Prefer to log time after the fact? Flip the timer into manual mode and type the start and end times.
Open the Time page
In the sidebar, click Time (the clock icon) to open Time Logs. The timer sits at the top of the page; below it are filters and your list of logged entries. The same timer also appears on the Today page (Today) if you'd rather work from your daily plan.
Start a timer
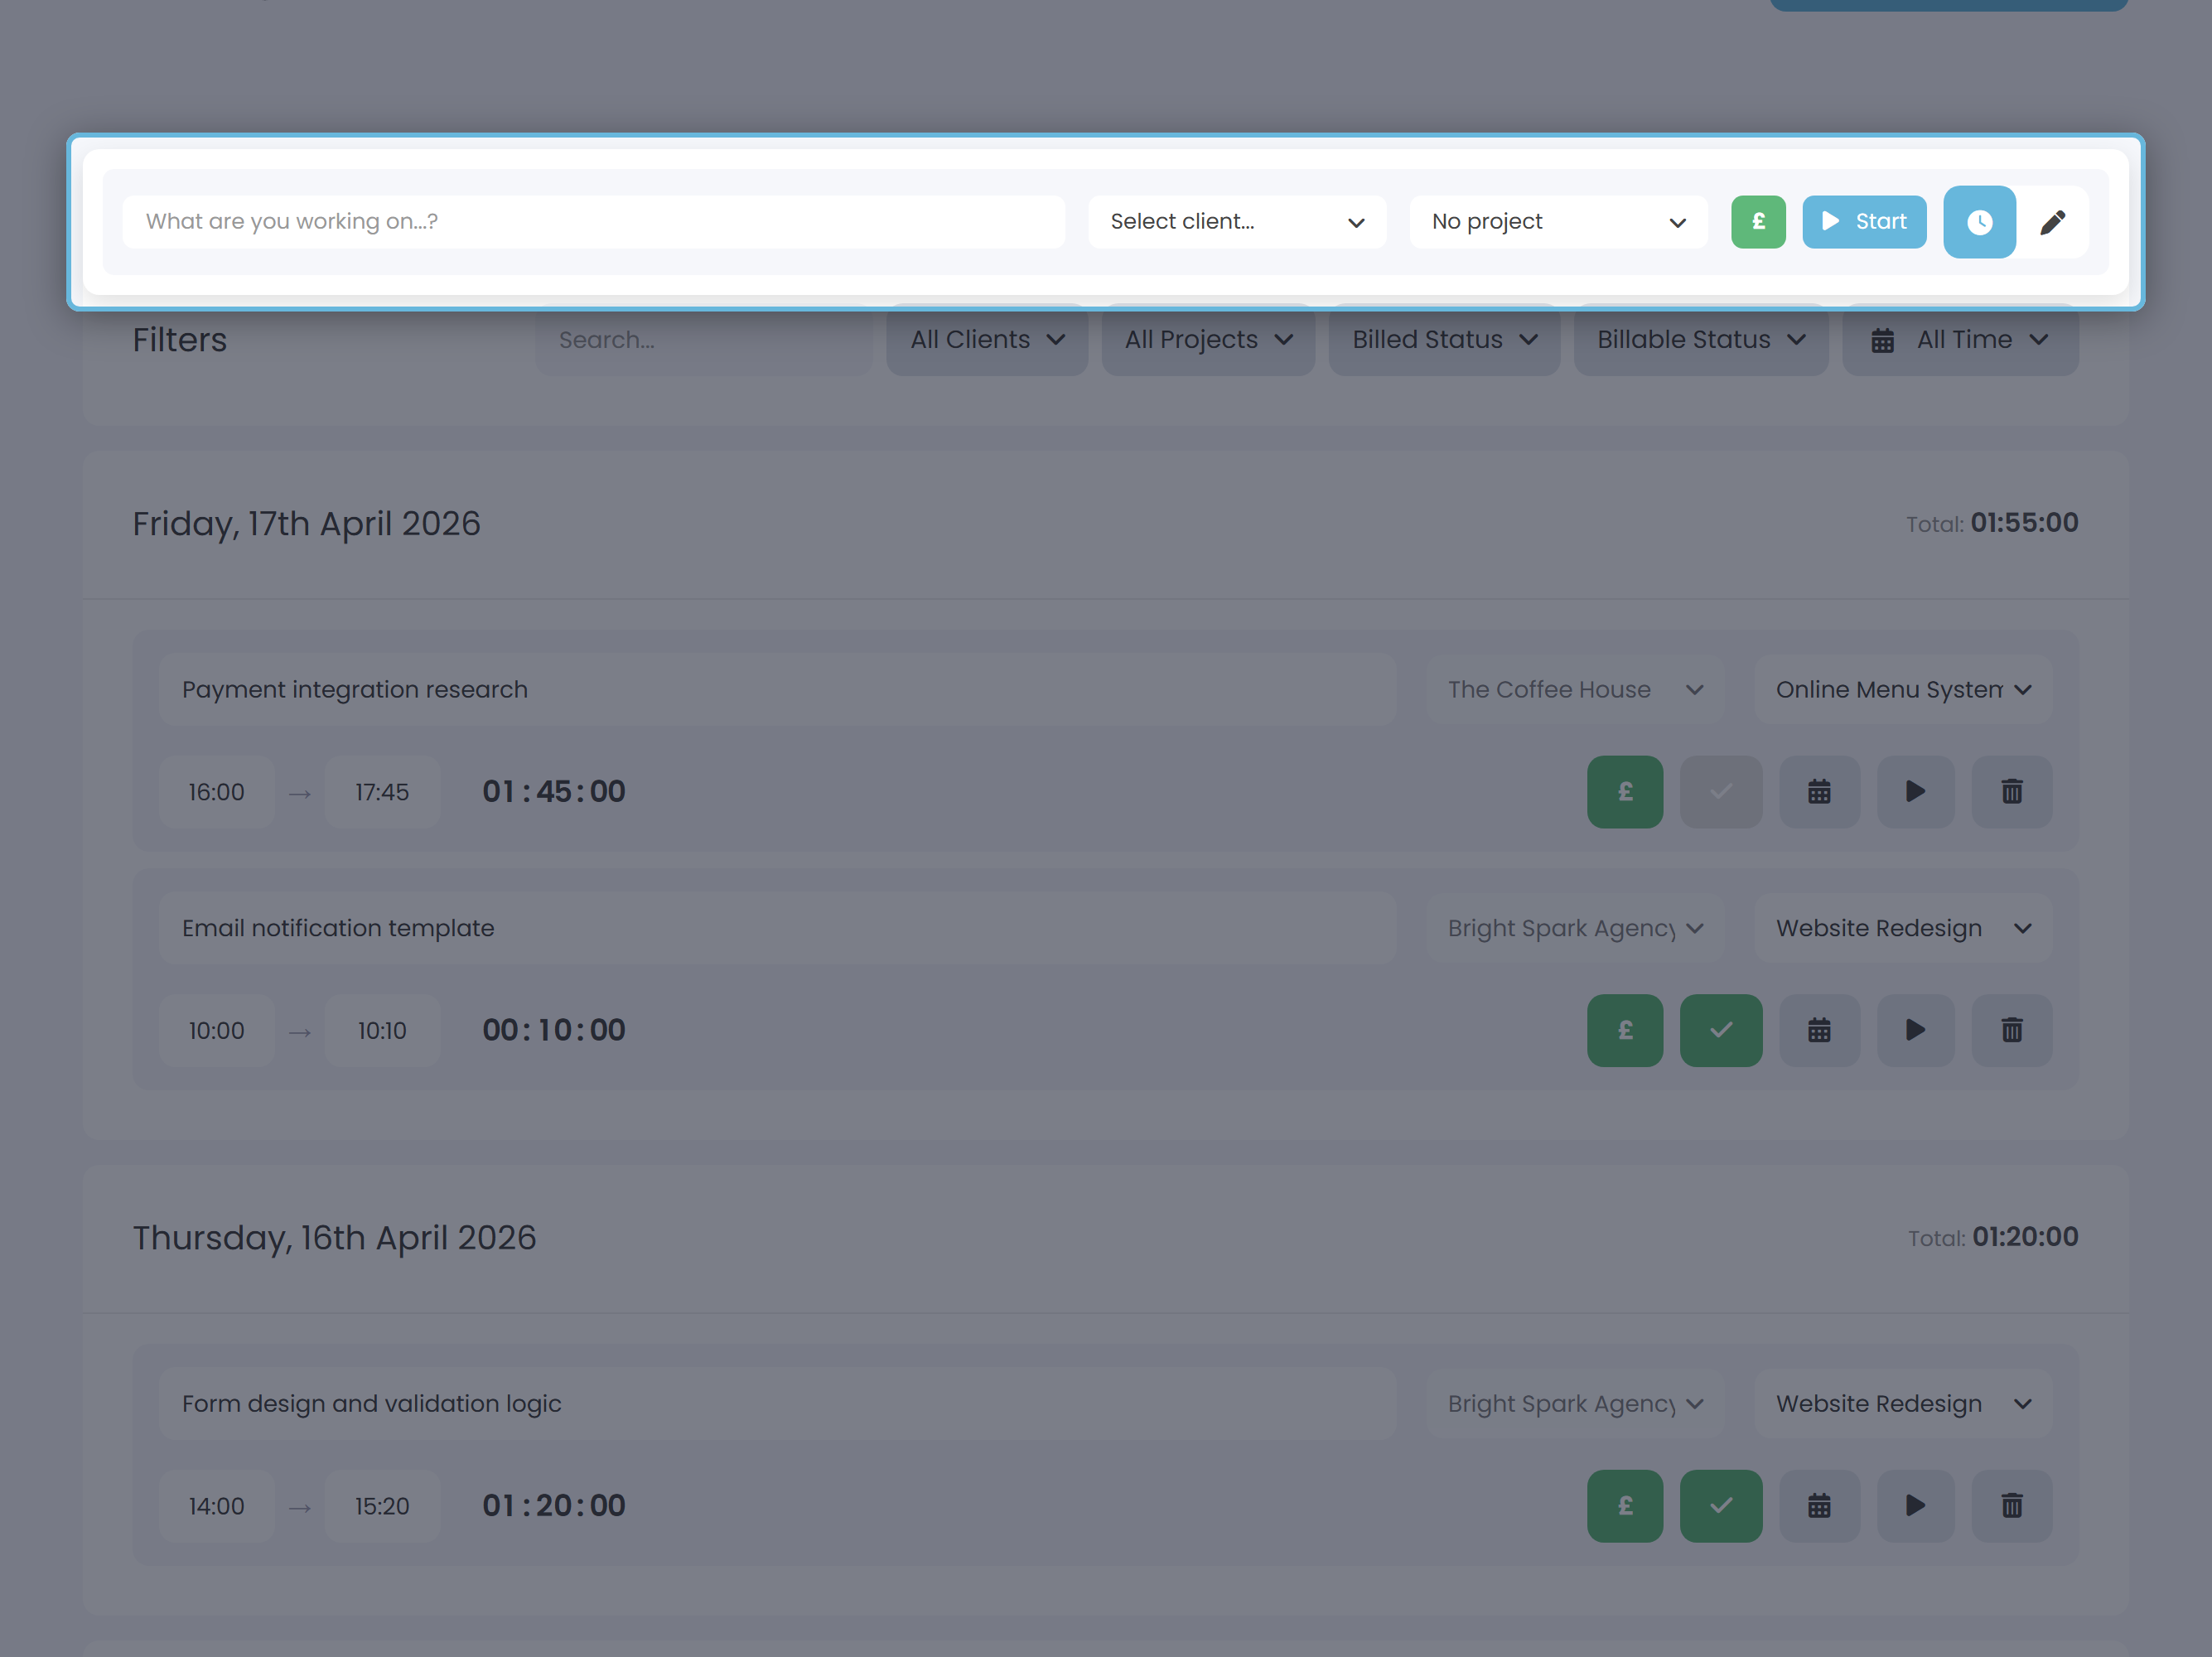
- Type what you're working on in the What are you working on...? box.
- Pick a Client, then a Project. Both dropdowns have a + Add new button if the client or project doesn't exist yet. Choosing a project auto-fills its client.
- Leave the £ toggle green for billable, or click it to flip to non-billable (grey).
- Click Start.
While the timer is running
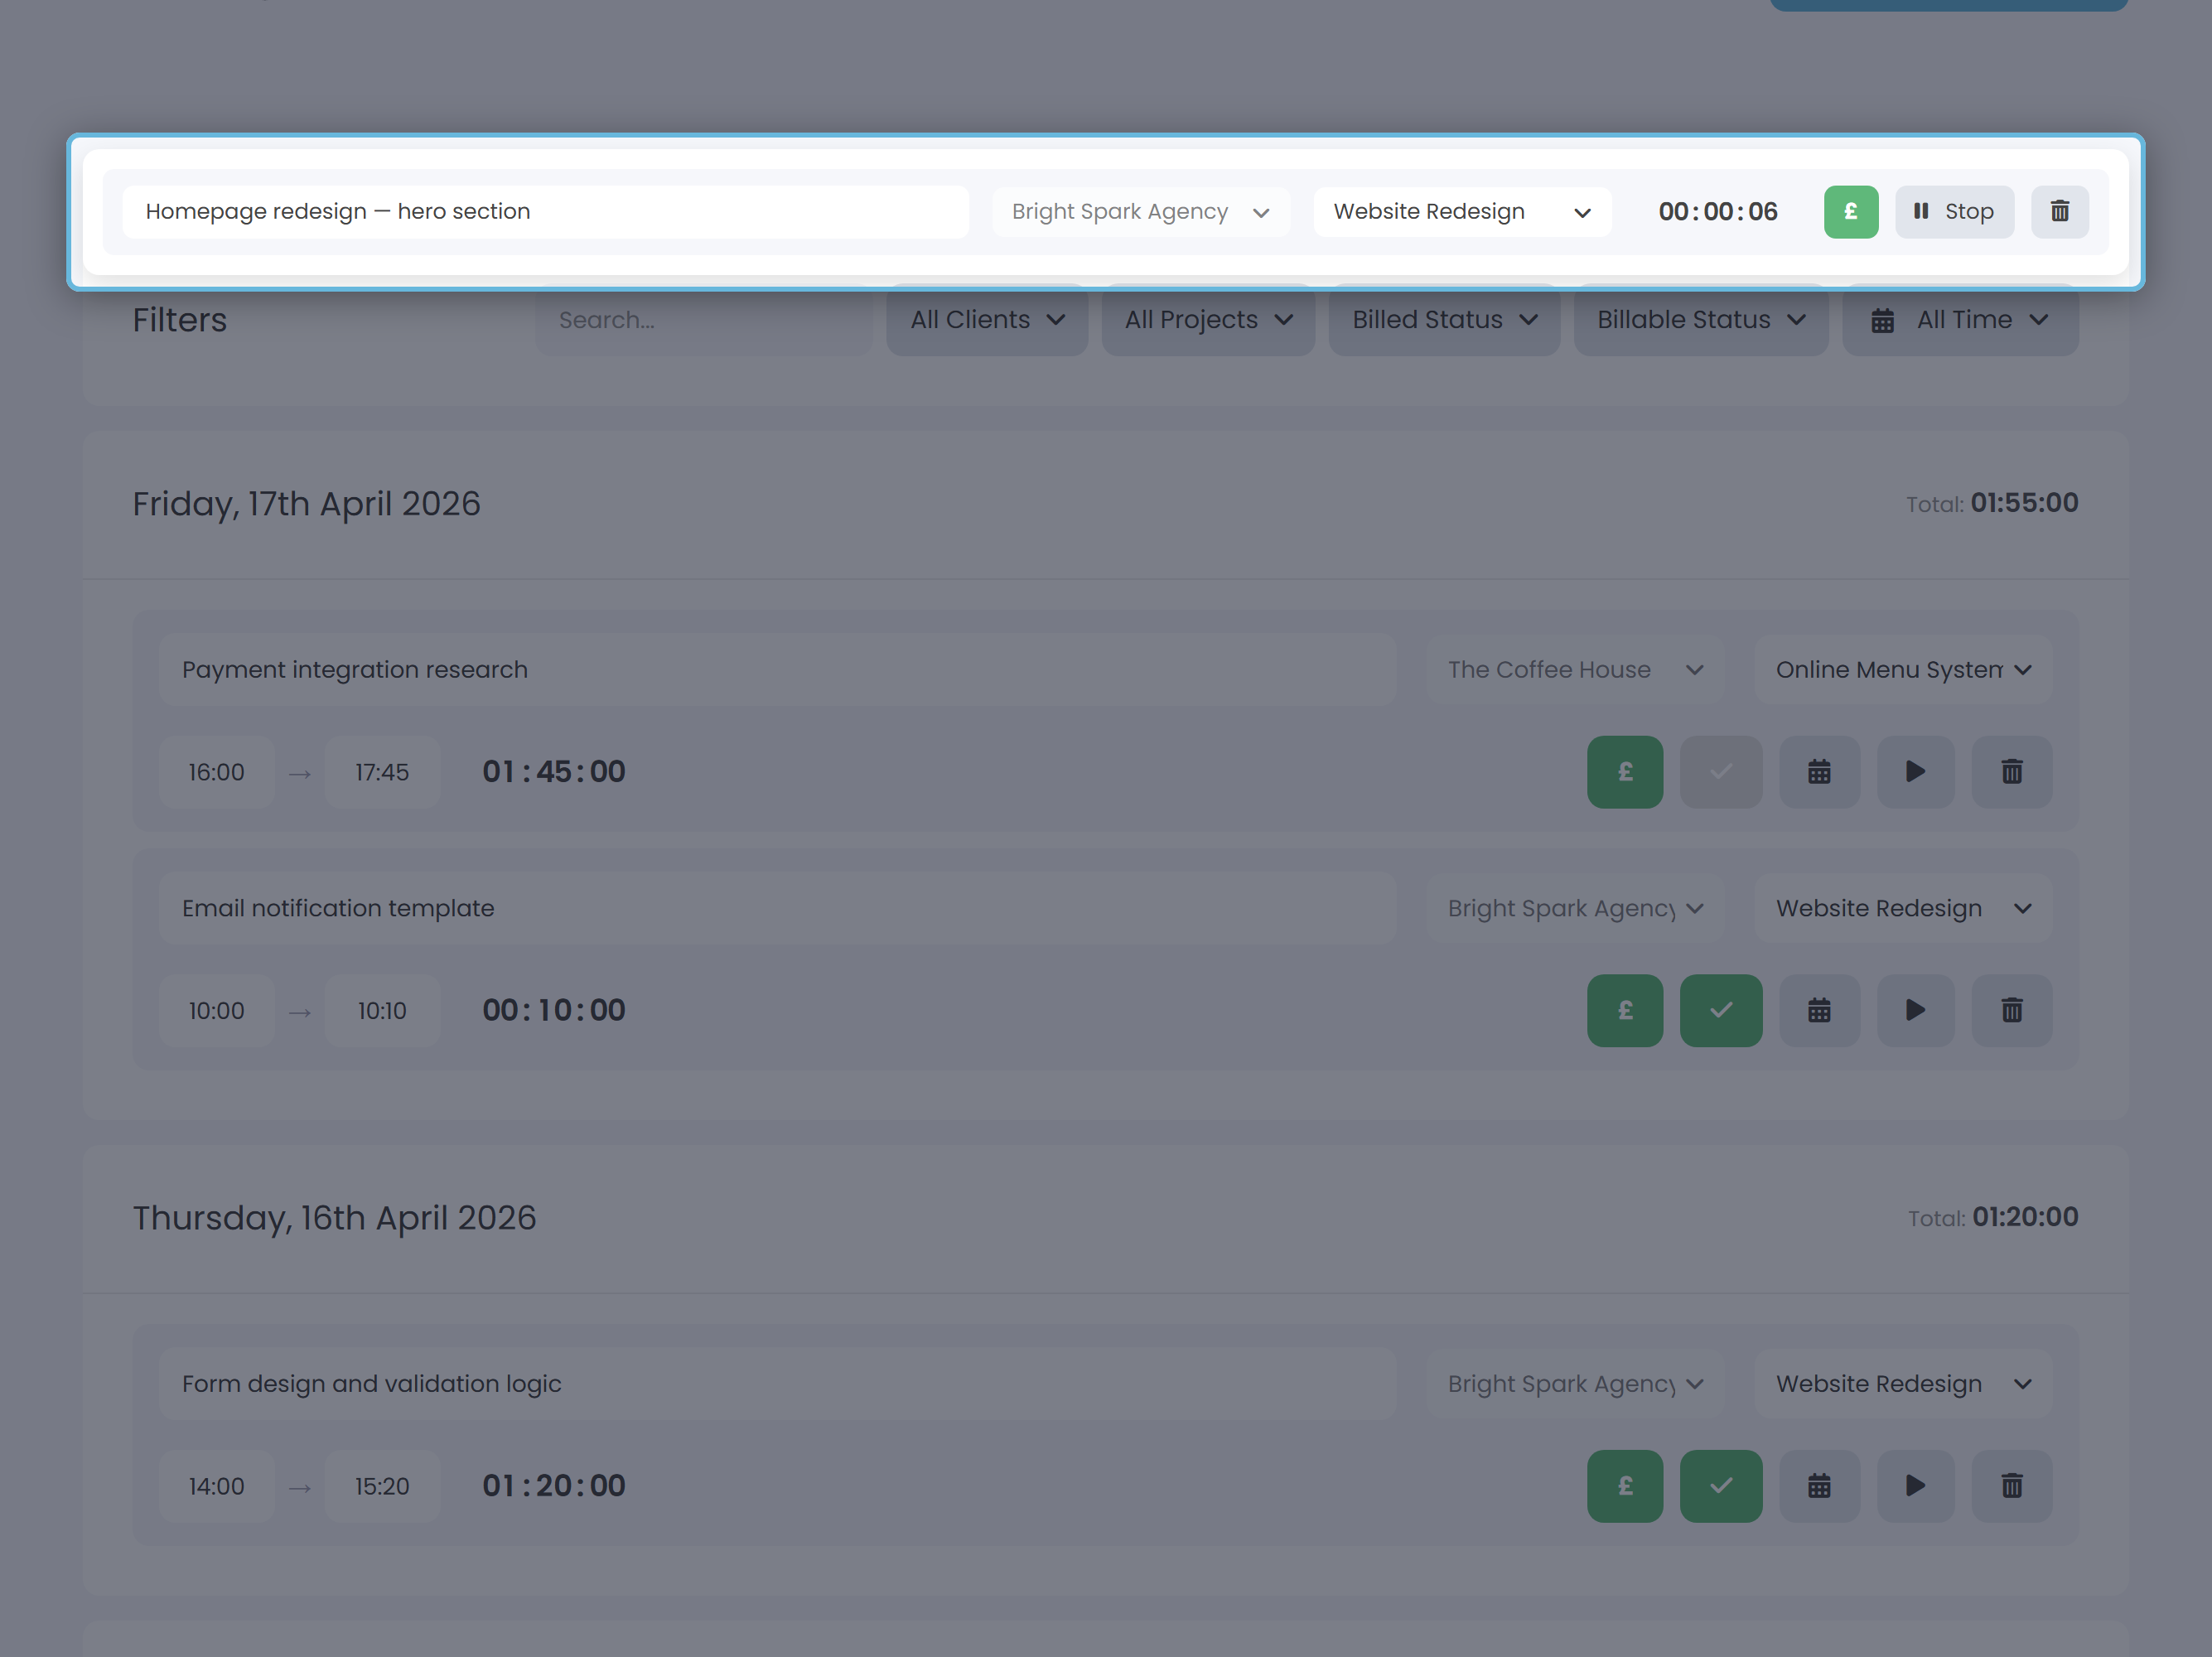
The row shows a live HH:MM:SS duration. Description, client and project stay editable inline. Click the duration to bring up a picker that lets you adjust the start time.
Click Stop to close and save the entry. If the timer is linked to a task you'll also see Stop & Done, which closes the entry and ticks the task off. The trash icon discards the timer entirely (with a confirm prompt).
Worked example
A freelance designer starts a timer for Acme - Website redesign at 9:00am, stops for lunch, starts again, and stops at 6pm with 8 billable hours logged. The Acme project has a project hourly rate of £45, so the day's tracked time is worth 8 × £45 = £360, ready to invoice.
Log time manually
Forgot to start the timer? Switch into manual mode using the pen icon on the right of the idle timer.
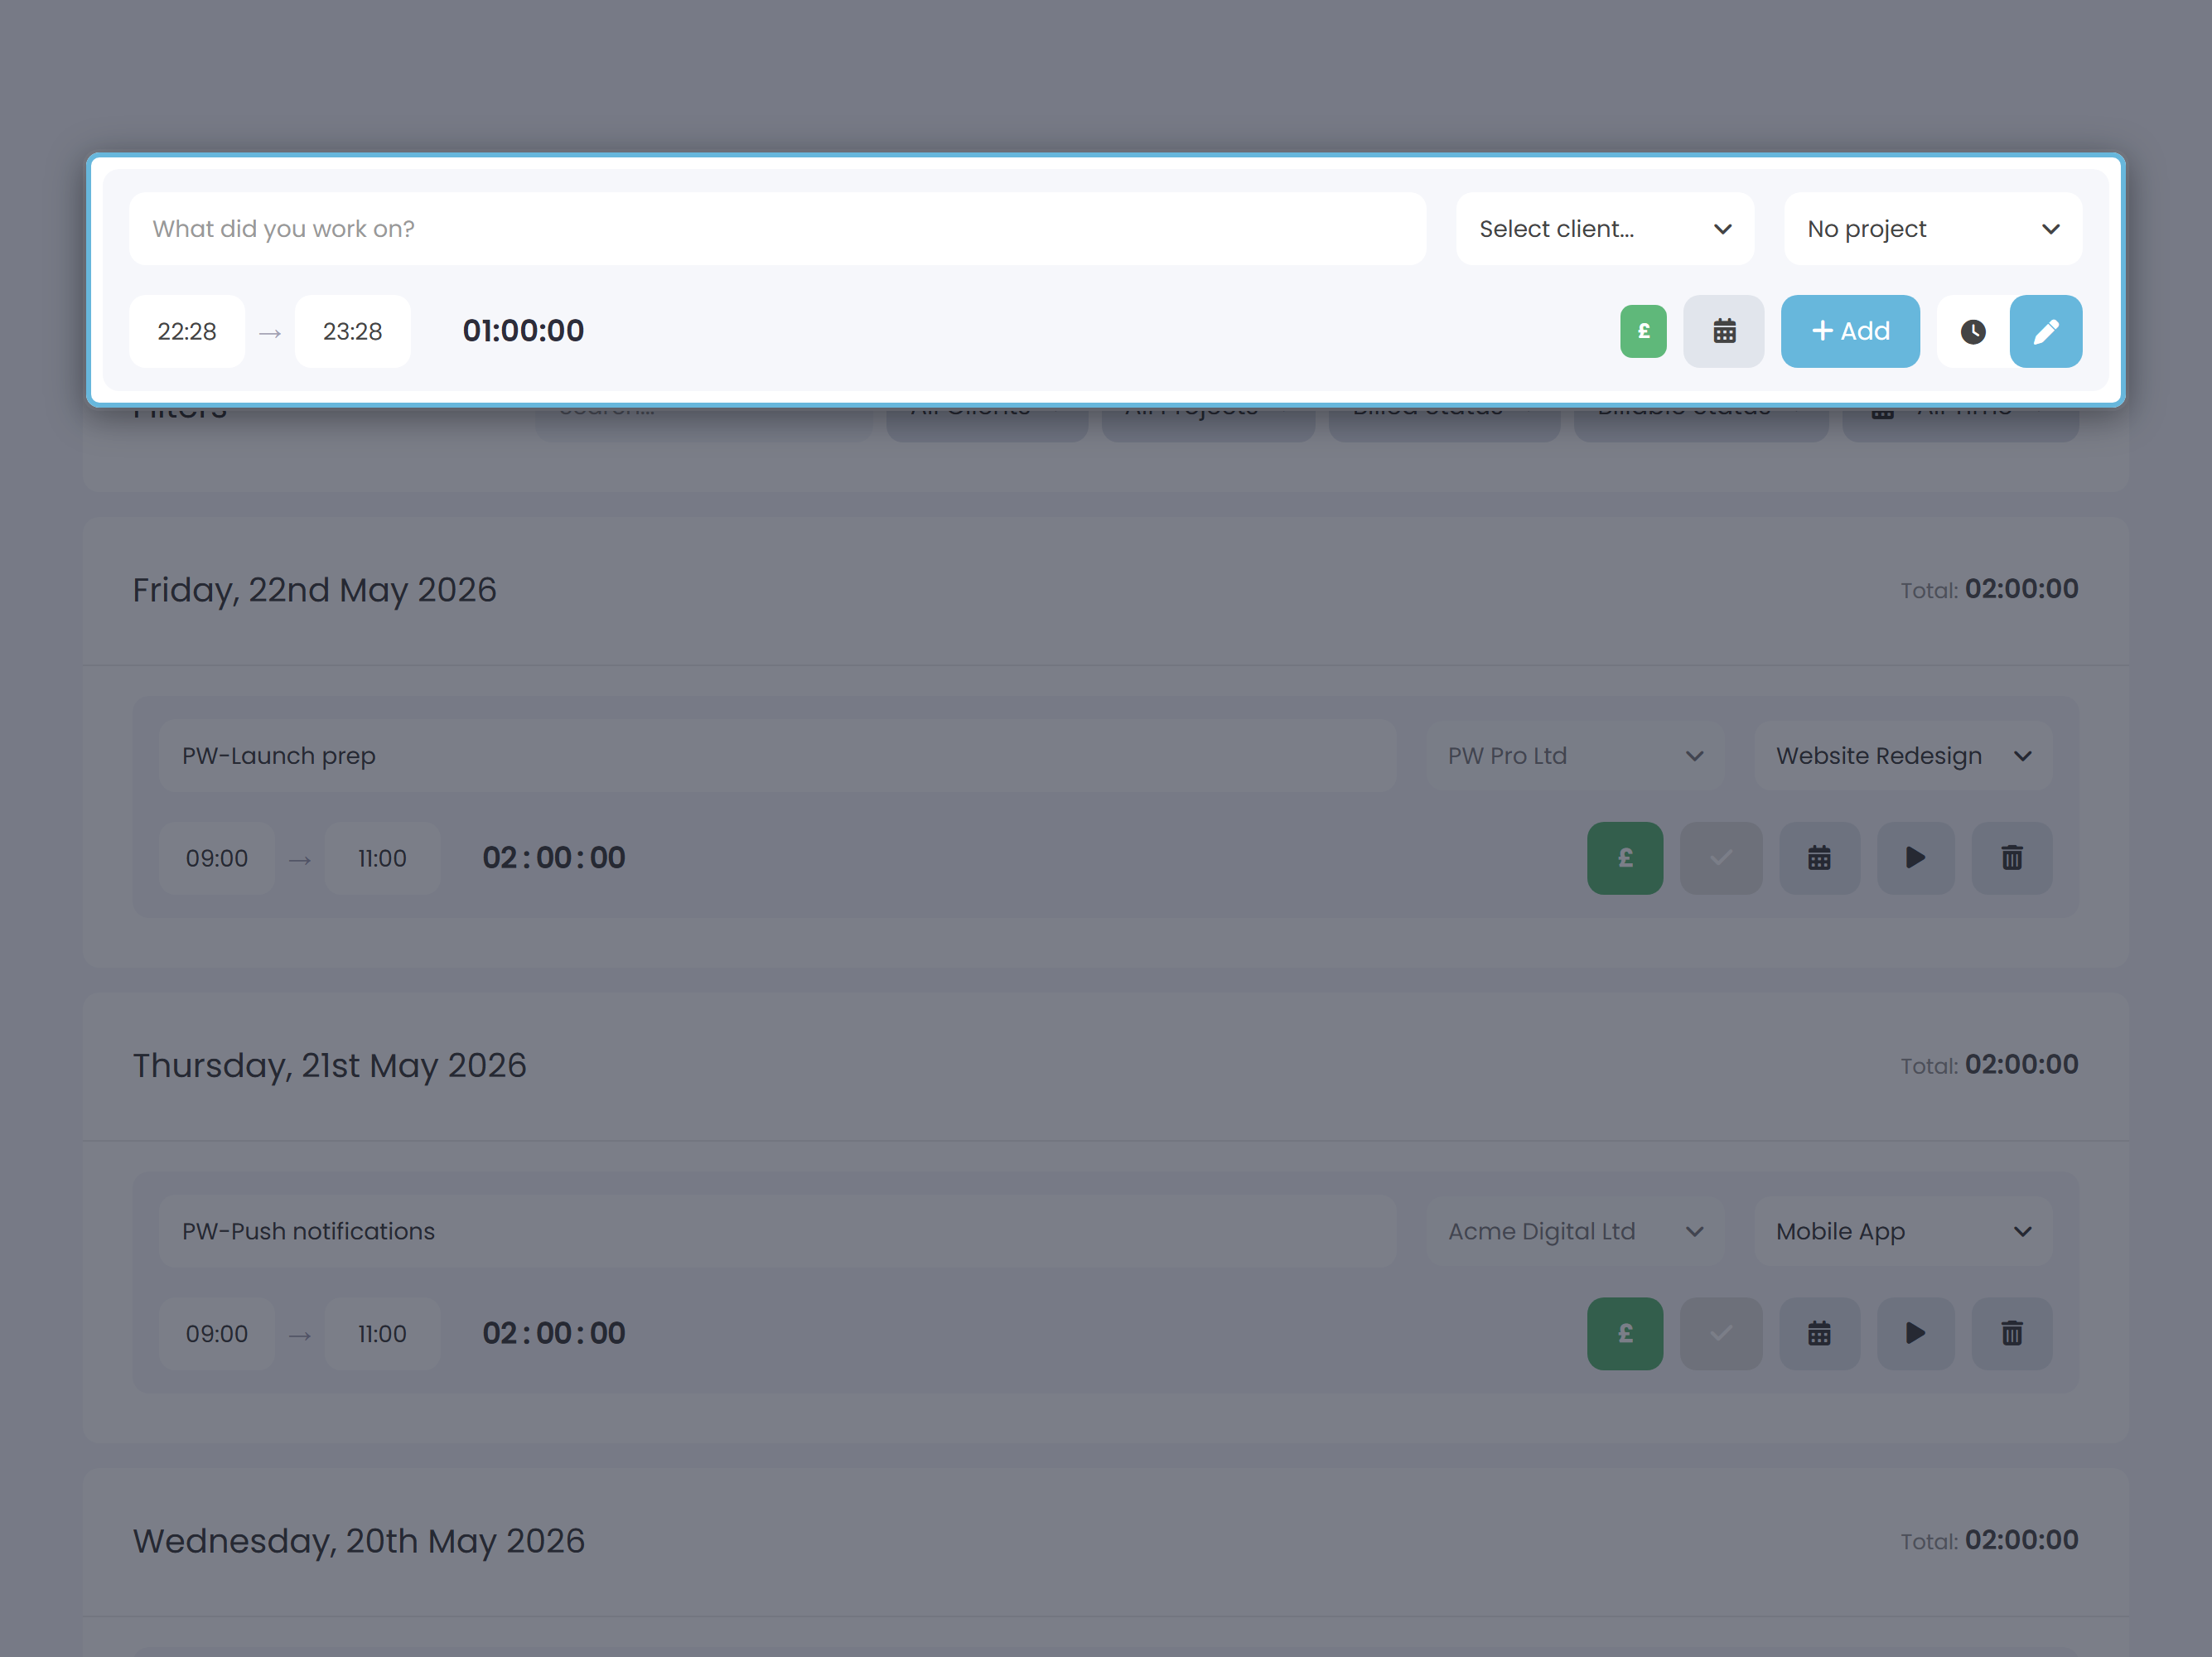
- Click the pen icon on the right of the timer row to switch into manual mode.
- Type a description, pick a client and project, then enter Start and End times in
HH:MM24-hour format (e.g.14:30). Keepr fills in the Duration as you type. - The date defaults to today - click the calendar icon to pick a different day. Then click Add. The form clears for the next entry, handy when you're catching up on a whole day.
How Keepr picks the hourly rate
Every entry gets an hourly rate stamped onto it the moment it saves. Keepr works it out with a three-step cascade - it picks the first level that has a real value (blank or zero counts as "not set"):
| Priority | Source | Where to set it |
|---|---|---|
| 1 | Project hourly rate | Edit the project at Projects. |
| 2 | Client hourly rate | Edit the client at Clients. |
| 3 | Account default rate | Settings → your default hourly rate. |
Editing and managing entries
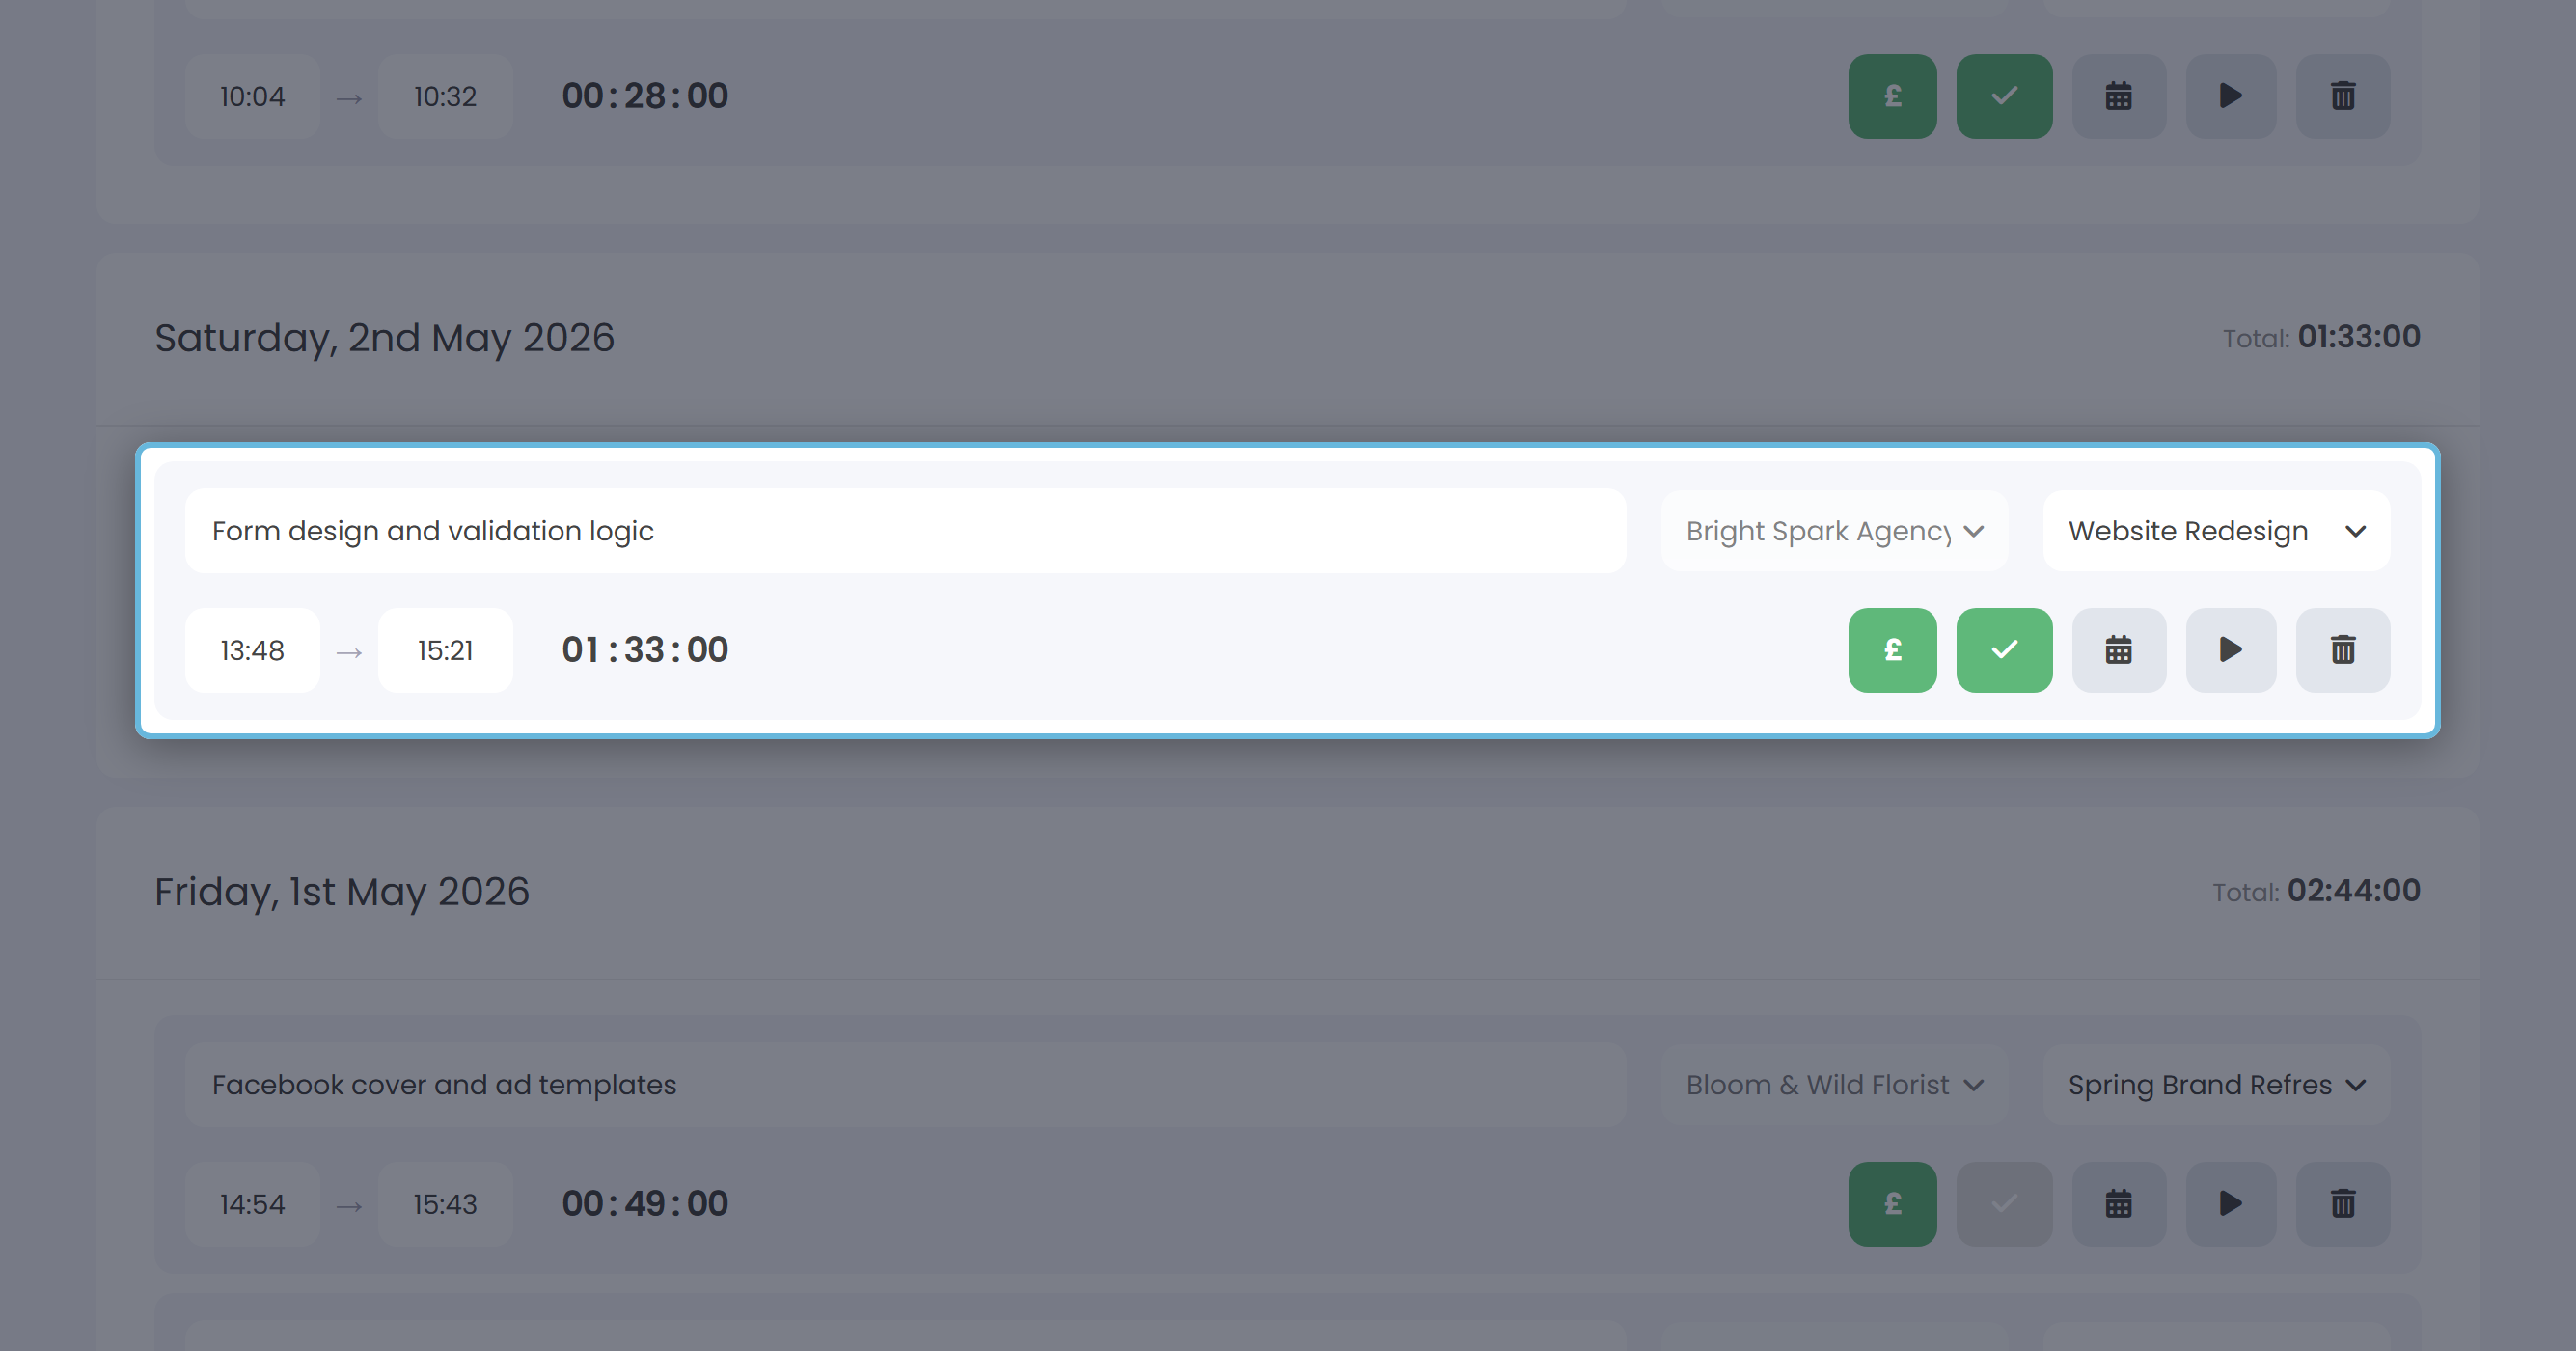
Every row in the time list is inline-editable - click the description, client, project or times to change them. The icons on the right are quick actions: £ toggles billable, the tick toggles billed (whether the entry's on an invoice yet), the calendar changes the date, the play icon starts a fresh timer using this entry's details, and the trash deletes the entry.
The filter bar above the list narrows what's shown by Search (description / client / project / task), Client, Project, Billed Status, Billable Status, and a date range. A Clear filters link appears once anything's active.
Turn your hours into an invoice
Top-right of the Time page is the Invoice unbilled time button. Click it to open the Invoice from Time wizard, which lists every billable entry you haven't yet invoiced. Filter the time list by client first and the wizard arrives pre-scoped. Once you've sent the invoice, Keepr stamps those entries as billed so they won't show up next time.
Reports on your time
Two time-specific reports live under Reports. Time Summary shows totals grouped by client, project, day or month, with CSV and Excel export. Time Details shows every individual entry - good for client-ready timesheets. Both work on the Free plan.